Matthew 14:20 … And they took up twelve baskets full of the broken pieces (of fabrics) left over.
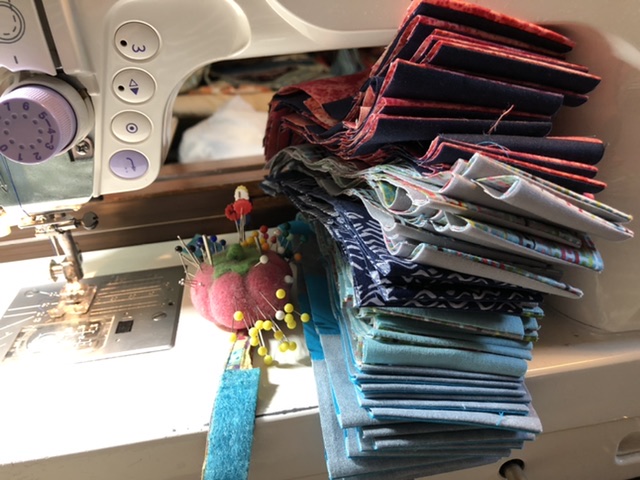
If you are following the blog, you might have read that I reorganized my sewing room recently. I knew I had a lot of selvages because I had been saving them for a couple of projects I had in mind. Today I started sorting my selvages by colors.
They kept multiplying.
About ten ziplocks later I had barely touched the pile. It was a start.
A few months later, I tore and pressed a muslin for the back.
I pressed the blacks.
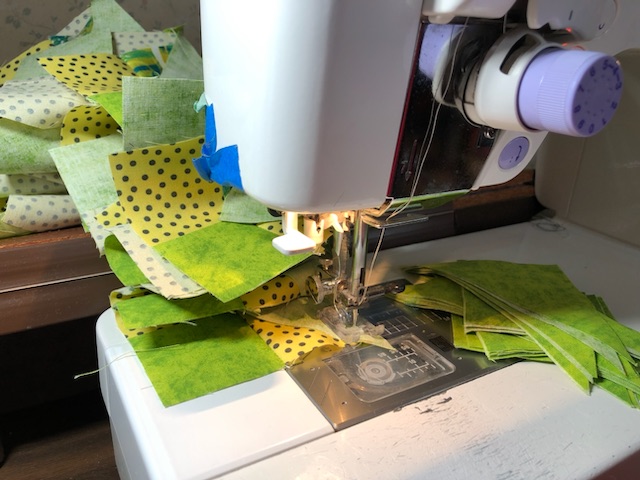
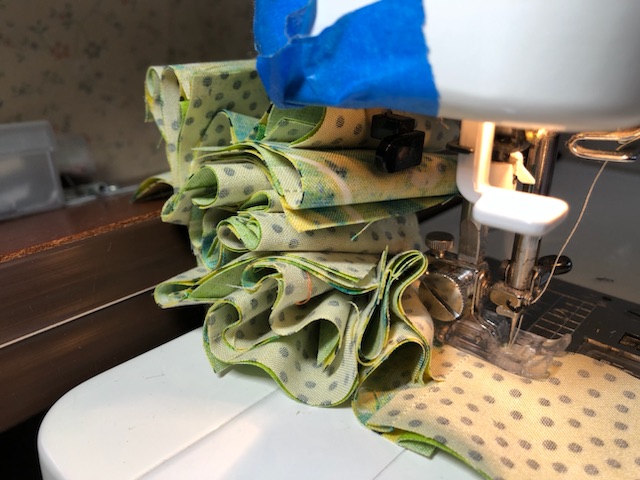
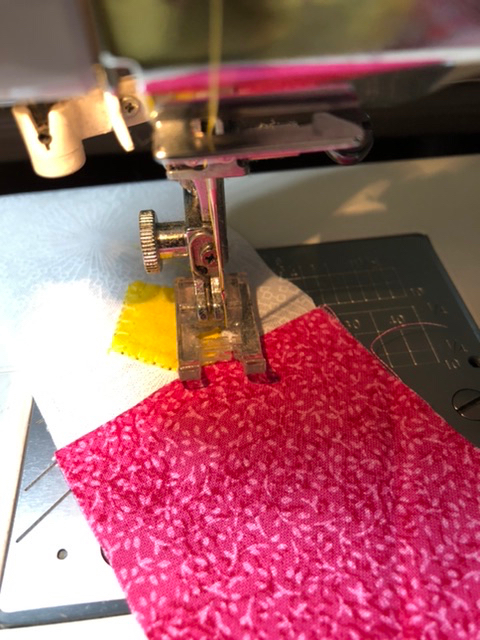
Then I placed them on the muslin lining them with the selvage information that I wanted. I overlapped them about a 1/4”.
I used my silicone mats to protect my ironing board and basting spray to hold the selvages in place.
I edge stitched the selvage using just a straight stitch. I’m thinking about making three of each bag of colors.
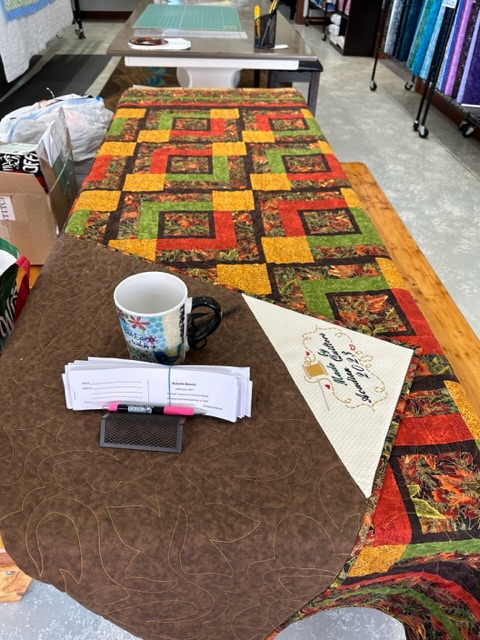
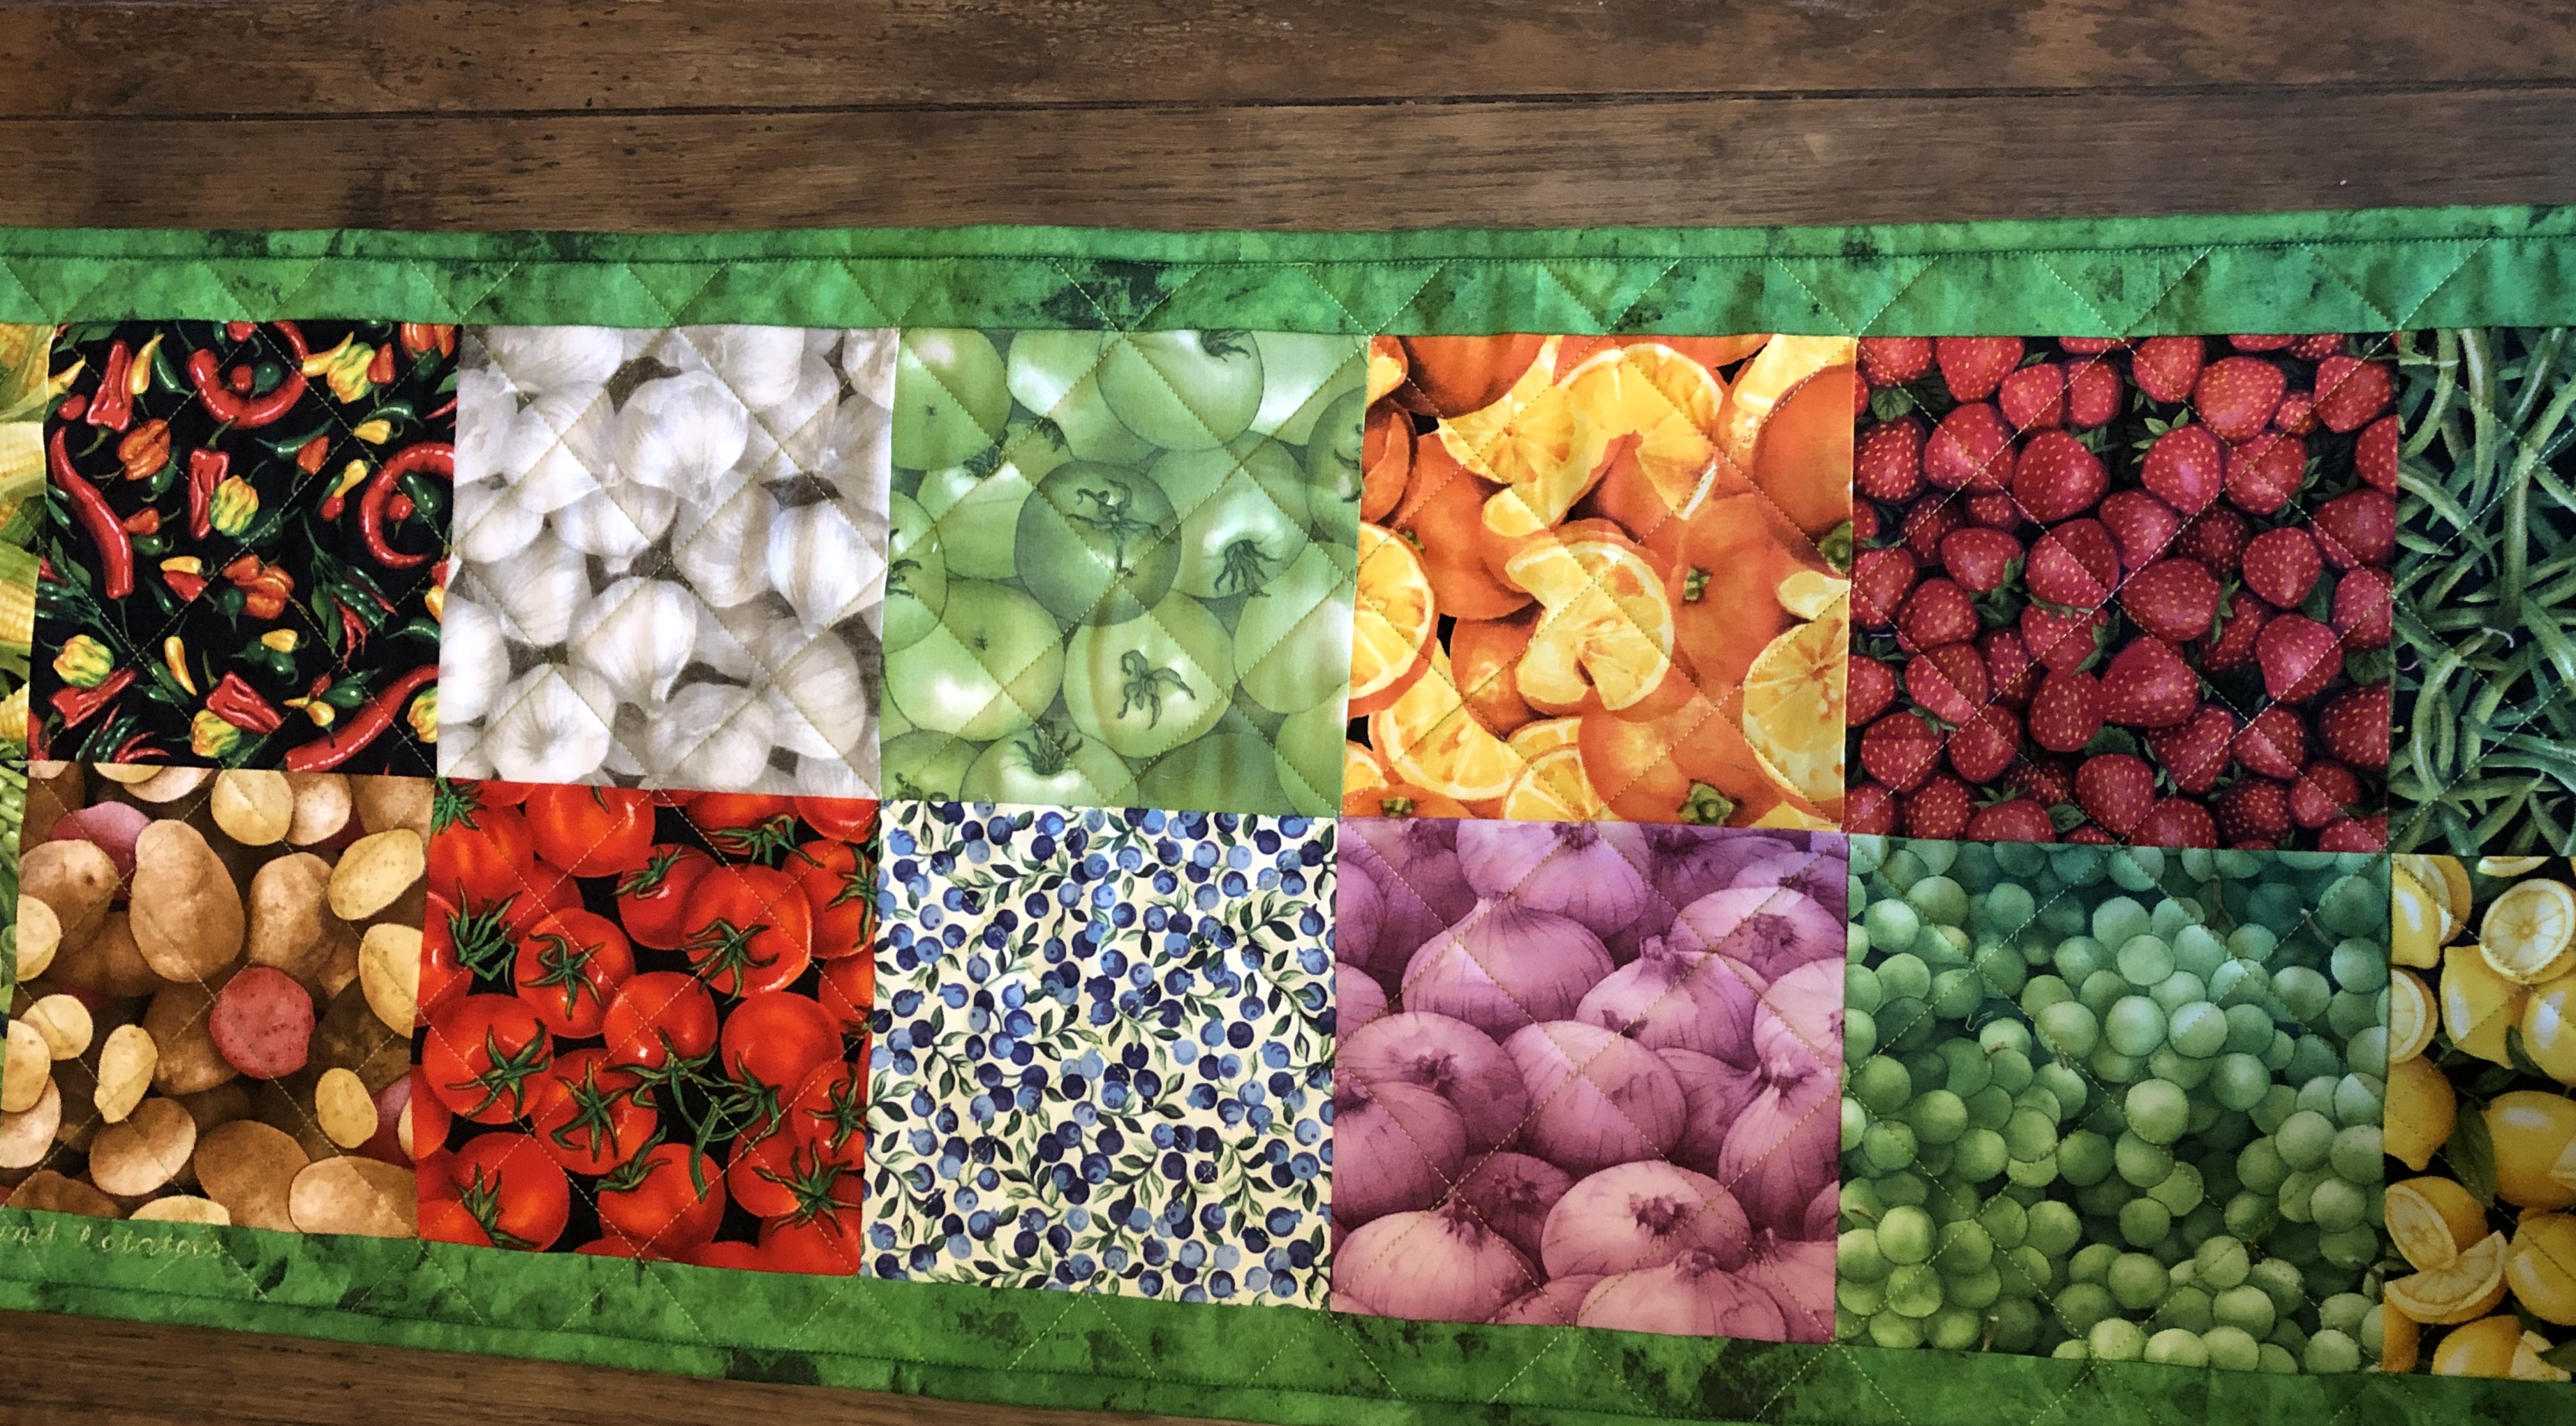
The other day I found this great coffee fabric. It was perfect for a table runner for my coffee table.
Have you tried basting spray? I like it for my runners. I usually cut the batting about a 1/2” wider than the top. I lay it on my ironing board and lightly spray about a foot at a time.
Next, place the top on the sprayed section and fan out with your hands to smooth it out. If needed, pull off and realign. Press to heat set the top to the batting. This also helps prevent the needle from getting gummy.
Signature programmed into the machine.
Lining up the pressure foot with the seam line to keep the embroidery fairly straight. It almost always moves a little on me.
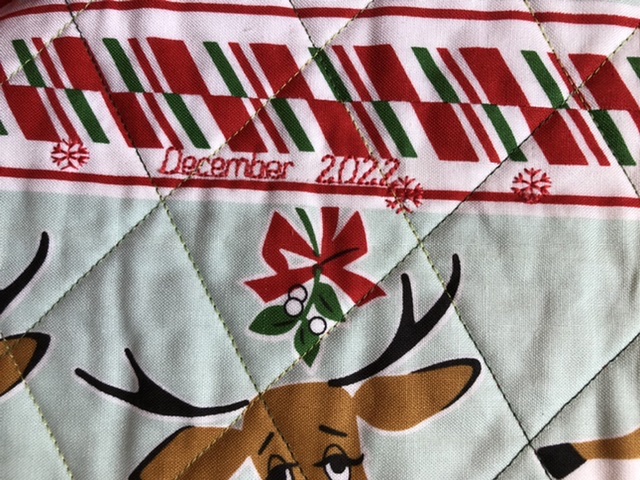
Signed. Typically I hide the signature, date and name of the project somewhere in the quilt.
After I get the embroidery done, I turn it over, batting side up, lightly spray the batting and place the back fabric on.
Ready to machine quilt. I dug out my trusty painters tape. It’s rolled up on the left and as I sew along I’ll roll it up on the right side.
Lined up.
All trimmed.
Pressing the binding.
Stitching the binding on the back first.
Binding on and pressed. Just in time for my coffee break!!
Matthew 6:31-33 “So don’t worry about these things, saying, ‘What will we eat? What will we drink? [Coffee?] What will we wear?’ These things dominate the thoughts of unbelievers, but your heavenly Father already knows all your needs. Seek the Kingdom of God above all else, and live righteously, and he will give you everything you need.
The snow on my roses from October stayed on them as November came in. Old Man Winter was lurking.
On the fifth, we had a spectacular appearance of the Aurora Borealis. My friend and photographer Paul Cyr captured this amazing photo.
Ezekiel 1:4 As I looked, behold, a stormy wind came out of the north, and a great cloud, with brightness around it, and fire flashing forth continually, and in the midst of the fire, as it were gleaming metal.
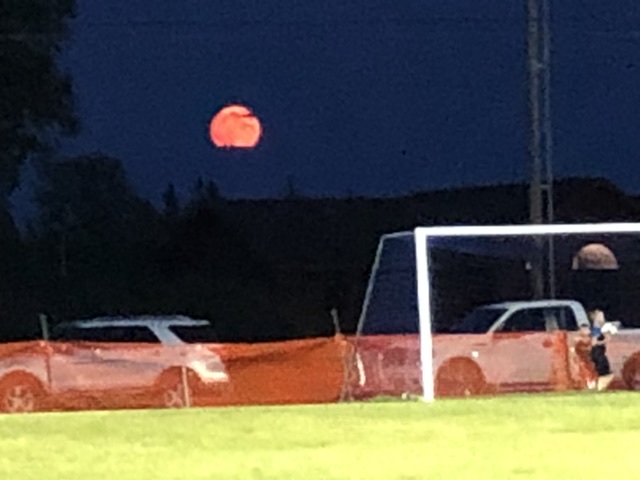
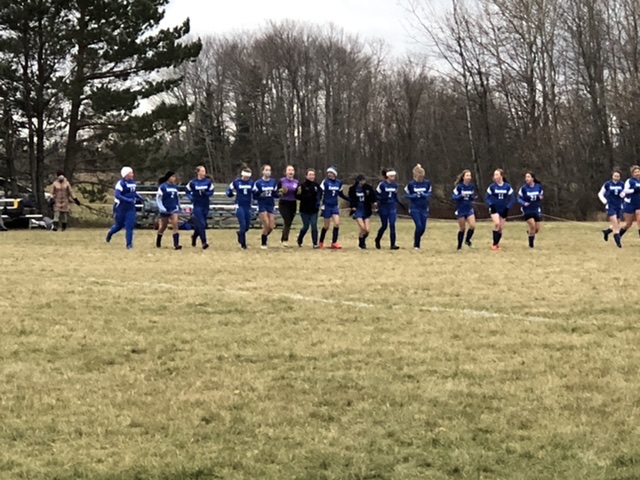
On the 7th our team won the Regional Championship game for their class.
Philippians 2:3 Don’t be selfish; don’t try to impress others. Be humble, thinking of others as better than yourselves.
On the 11th our co-pilot navigated us to Messalonskee High School for the state championship game. As you might notice, we were outnumbered by the opponents, they had about thirty players to our fifteen including ten seniors. In addition, they all seemed to be much taller than our team. Our guys played hard and lost only by two, 5-3.
As we were leaving, a woman asked us where Easton was and added, ‘isn’t it in Canada?’ We explained that it was indeed in the USA. She then asked how long it took to get there. We said about four-hours. We took the bait and asked how long it took them to get there. She said, “half hour, maybe 45-minutes.” I thought maybe they wouldn’t have been so fast and energetic had they had a four-hour bus ride to the field? Nevertheless, we made it to the State Championship game and played hard to the end and are State Runners Up.
1 Corinthians 9:25 Everyone who competes in the games goes into strict training. They do it to get a crown that will not last, but we do it to get a crown that will last forever.
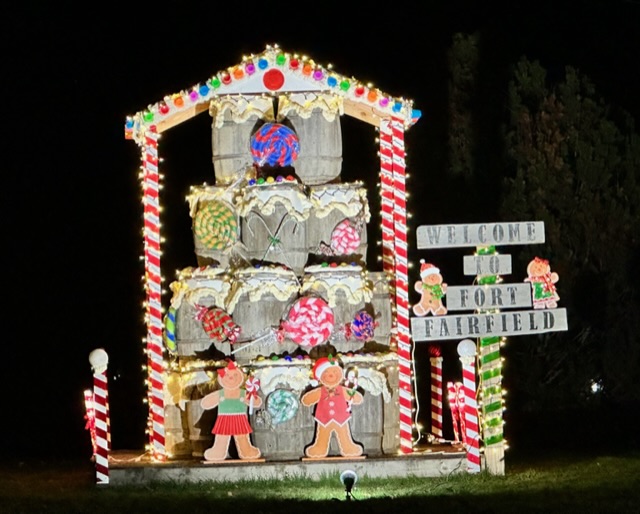
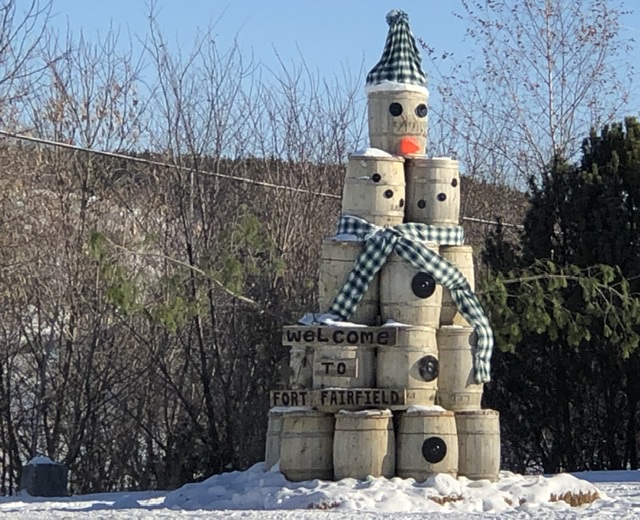
My creative friends built a Gingerbarrel House. The lights are on, but they don’t really show up in the picture.
Saw my Thanksgiving dinner getting fattened up a week before the big day.
The old folklores are more accurate than the meteorologist.
Our local weatherman did his winter weather forecast. He explained that we are (still) in an El Niño weather pattern. He predicts above average temperatures. His precipitation forecast is typical for a weatherman, equal chances of below or above average. A friend of mine used to say, “it’s the only job that you can be 100% wrong and still keep your job.”
This day was a little warmer than usual for mid-November, 48° and it’s supposed to be 52° tomorrow. I’ll take it with fuel prices higher than ever, $4.09/gallon, welcome El Niño.
Job 37:9 “Out of the south comes the storm, And out of the north the cold.
1 Thessalonians 5:18 “Give thanks in all circumstances; for this is the will of God in Christ Jesus for you”
We enjoyed a wonderful Thanksgiving Day.
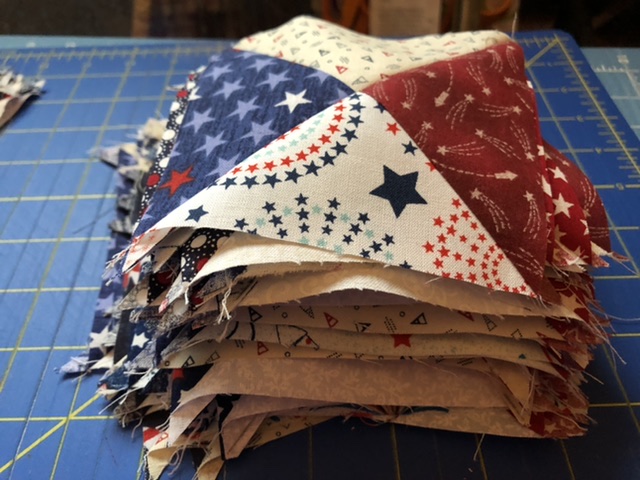
Black Friday was perfect for setting up the next batch of temperature squares. There’s a few in this bunch that I still need to find some cool temperature fabric from my stash.
In the meantime I’ll sew this pile and finish these tomorrow.
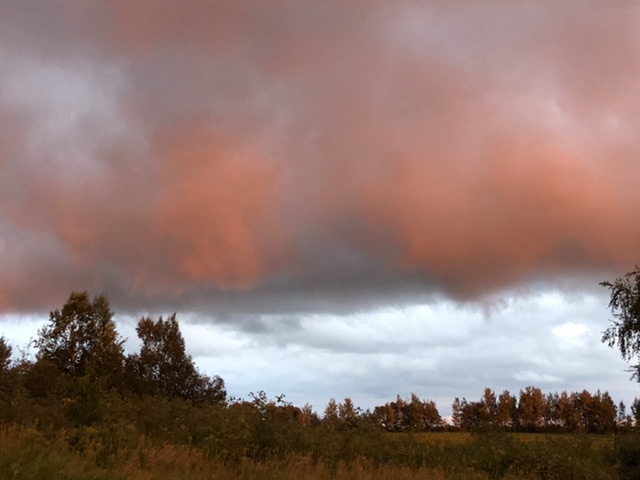
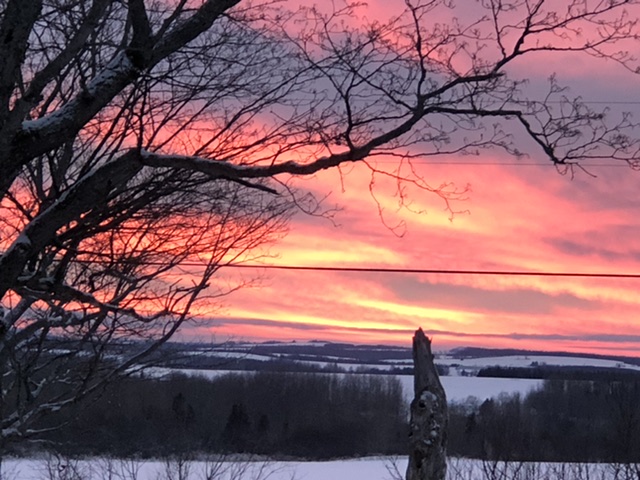
The month ended with a beautiful sunset.
Matthew 16:3 He replied, “You are good at reading the weather signs of the skies—red sky tonight means fair weather tomorrow; red sky in the morning means foul weather all day—but you can’t read the obvious signs of the times!
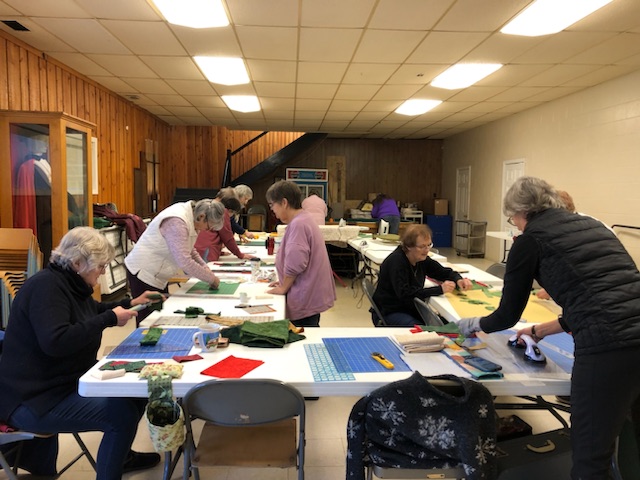
Today when I arrived at the Guild meeting, a few members were participating in a workshop on ‘landscape quilting.’
It’s layering fabric to achieve the look you want. Here different color paper becomes pattern pieces. Layers of fabric become sky, mountains and snow. This particular one was a kit complete with pattern and fabric.
Figuring out the next step.
Deuteronomy 31:6 So be strong and courageous! Do not be afraid and do not panic before them. For the Lord your God will personally go ahead of you. He will neither fail you nor abandon you.”
We had another potluck salad bar for lunch.
The First Demo -Thread Painting
This demonstration was how to thread paint. She explained how to lower the feed dogs in order to do free motion. Here, she is using brown thread, moving the fabric back and forth to achieve textured bear fur. Later she will blend in other browns and blacks to create shading. The bear will be placed in the grass layers to make it look 3-D.
The Second Demo – Cathedral Window
This lady demonstrated two different methods of how she makes Cathedral Windows. The first method (light fabric) is using one large square and finger pressing the fabric in place. The second method uses small squares (green and red) and using four to basically make the same as the larger square.
She adds the color square and hand stitches it. You could hardly see the stitches.
She showed us another Cathedral Window that she is doing for a friend. It was the woman’s wedding gown 40-years ago and wants it made into a pillow.
1 Kings 6:4 He made narrow windows high up in the temple walls.
Sew & Tell
This lady showed her Christmas table topper.
Next up, Picnic Quilt. The pink centers are a Christmas fabric and all the other fabrics are coordinating colors from her stash.
This woman showed two baby quilts.
This lady showed a Christmas table runner and explained how she added the gold trim.
She also showed her latest paper pieced quilt. It was spectacular.
This woman showed her Moth wall hanging. She took a class during the Maine Quilt Show back in July and explained the different skills used in making it.
Tools of the trade, staple gun and painters tape. Another great day at the Guild.
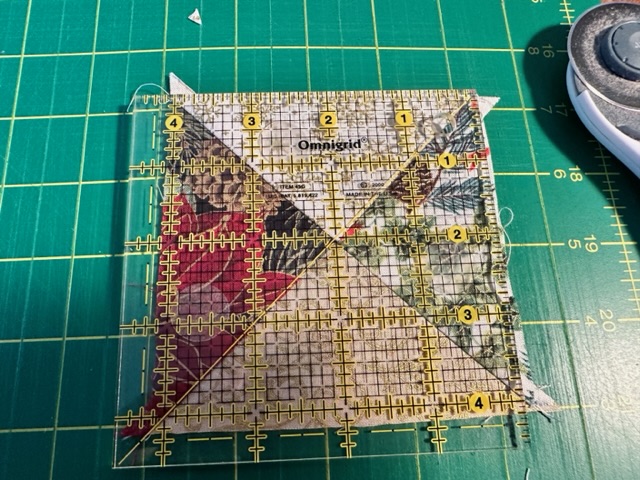
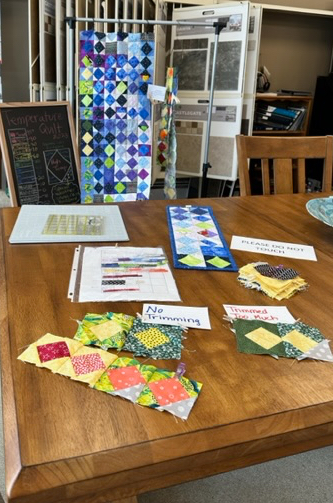
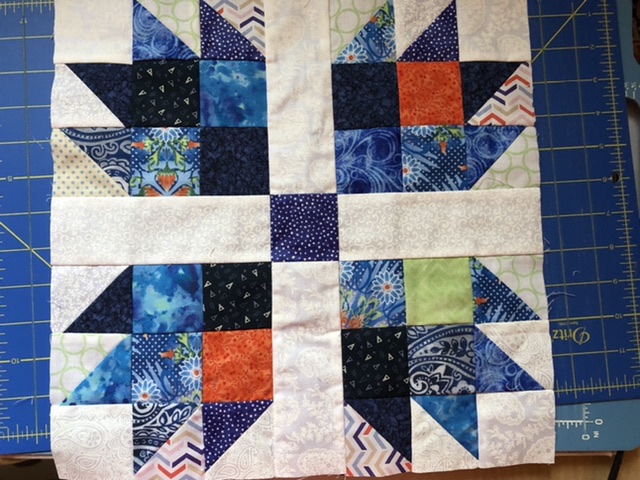
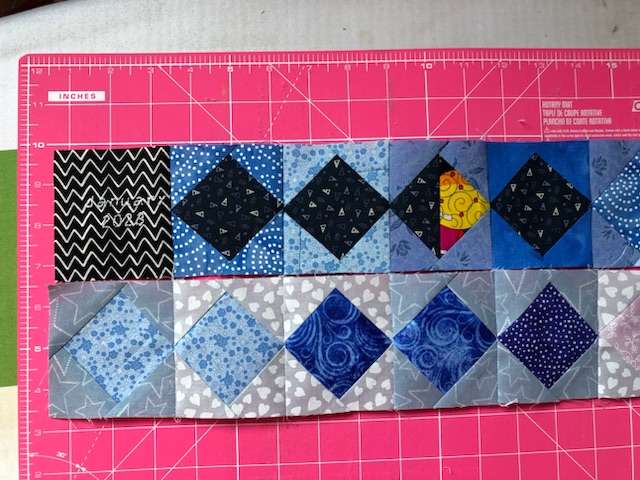
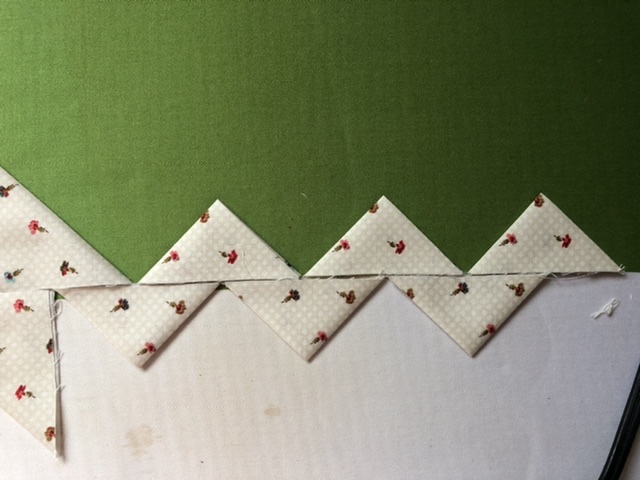
Today I started making some quarter square triangles, QST’s. First using my trusty #2 pencil I drew diagonal lines on the light squares.
After stitching 1/4” on both sides of my pencil line. I cut on the line creating two half square triangles. Press them to the dark fabric.
I forgot to get a picture of the prior step, however you can see it here. Right sides together, line up two half square triangles (I placed a light to a dark on most, but it could be random,) and draw another diagonal line. Stitch 1/4” on each side of the line. Next, cut on the pencil line. Here I carefully line up three units and cut all at once.
Then I placed my cutting tool on the pencil line. I usually line up with a line on my cutting board and place the pencil line on it too, like a double check.
Quickly cut. Ready to press.
All pressed.
Time to trim. Here’s another time I do a double check, I line up the center point of the square where the centers meet and line up the diagonal line on the ruler with the diagonal seams. It will be about a 1/8” trim on each side. I trim the right side and top, then rotate the square to trim the other two sides.
For the runner, I sewed rows of three alternating lights and darks. I used my flathead pins that I used a sharpie to number them for the rows.
I pressed the rows north and south, or one row up and the next row down so the seams will nest together when I put them together.
Rows are together and machine quilted. Wasn’t that quick?
Luke 2:14 “Glory to God in the highest, And on earth peace, goodwill toward men!”
Ready to trim.
All trimmed. Sew quick. Ready for the binding.
I won the thread chicken game!!
Pressed and ready for my nieces project graduation fundraiser.
Isaiah 9:6 A child is born to us! A son is given to us! And he will be our ruler. He will be called, “Wonderful Counselor,” “Mighty God,” “Eternal Father,” “Prince of Peace.”
October started with a beautiful foggy, hazy sunrise.
I was in a fog. Later I heard some of it was smoke from a Canadian wildfire.
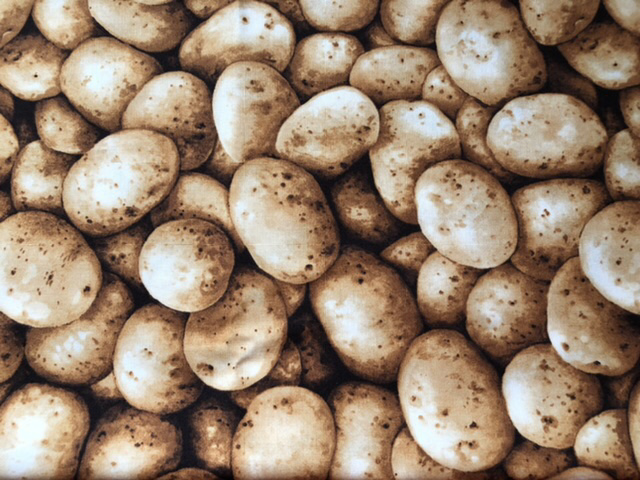
Potato harvest in full swing.
It rained overnight and was too wet to dig.
The sweet smell of topsoil from freshly dug potatoes.
Jeremiah 5:24 Neither say they in their heart, Let us now fear the LORD our God, that giveth rain, both the former and the latter, in his season: he reserved unto us the appointed weeks of the harvest.
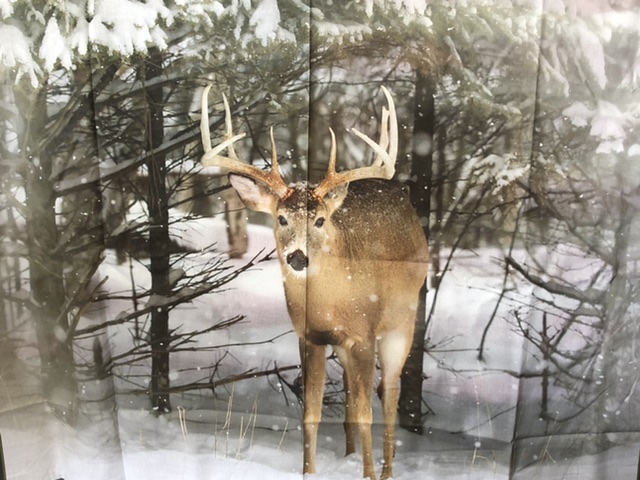
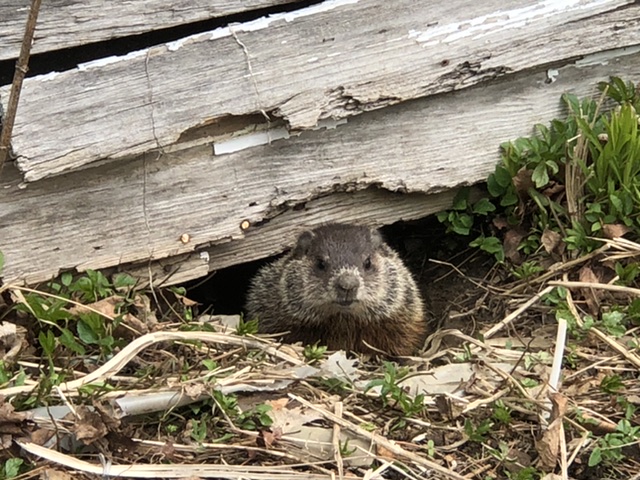
Saw this guy.
Another traffic jam.
My beautiful leaves before hurricane Philippe.
A day or two after Philippe.
About mid-month. Still getting some El Niño rains, but the temperatures are staying warmer than usual and the sunsets are gorgeous!!
Matthew 16:3 He replied, “You are good at reading the weather signs of the skies—red sky tonight means fair weather tomorrow; red sky in the morning means foul weather all day—but you can’t read the obvious signs of the times!
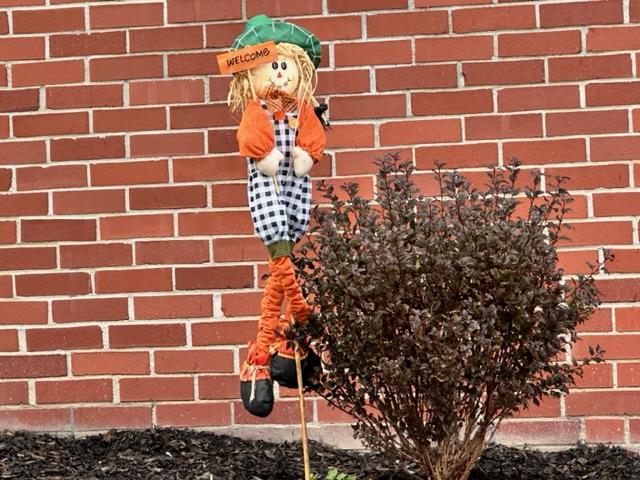
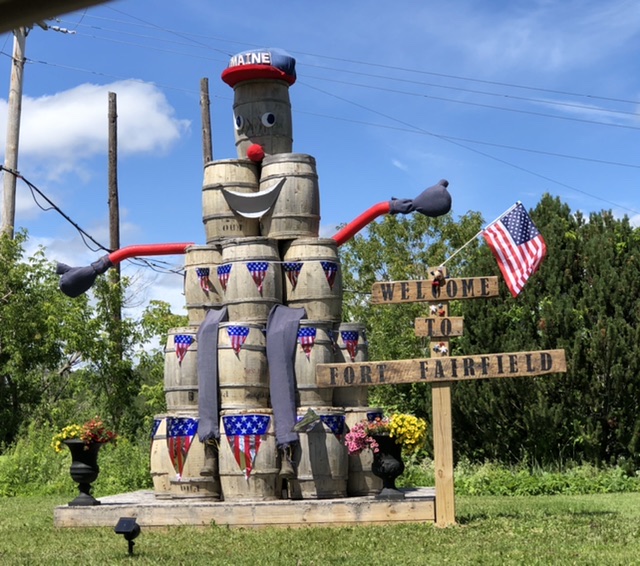
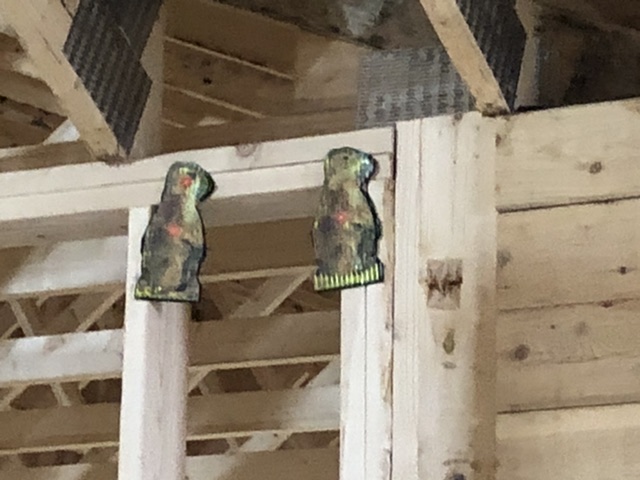
My friends are so creative and have another great seasonal barrel display welcoming folks to town.
Saw this majestic guy. He had been in the road, but didn’t fly too far away.
It’s frosty. First frost of the season.
1 Corinthians 15:33 Don’t be fooled by those who say such evil things. If you listen to them you will start acting like them.
Yes, I did sew on my temperature squares. Notice the date on the top one, 9/16. The October ones are at the bottom of the pile.
Can you see it? My burdocks are too tall.
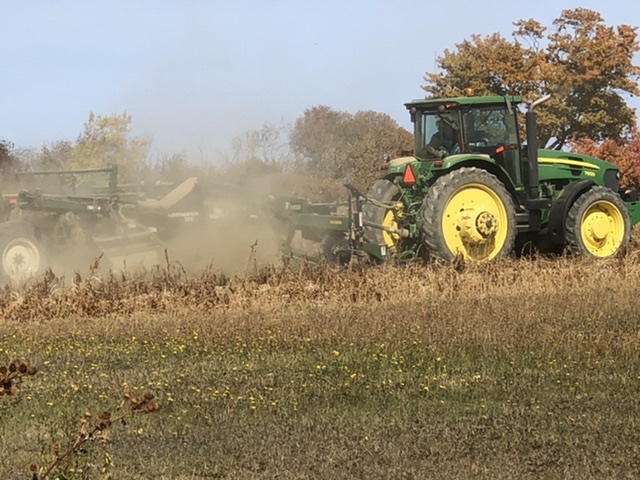
It’s fall plowing.
Isaiah 28:24 Does the farmer plow continually to plant seed? Does he continually turn and harrow the ground?
Here’s how I set up my Ford assembly cutting/sewing line. First I write the date in what will be the seam on the high temperature square and line them up. Next, since we are still in an El Niño weather pattern, I add a gray polka dot fabric representing rain to the dates it rained. Then I add the low temperature colors to the piles.
All the dates stitched and ready to be trimmed and pressed.
All pressed and ready for squaring up.
By the end of the month, the leaves were all down. My dear old neighbor used to say that when the leaves were off the maples, it would snow.
Two days later on the 30th, we got our first snow of the season.
I had tried to get a picture of the Partial Eclipse and the Hunter’s Moon but it was too cloudy. I think my roses are just as beautiful.
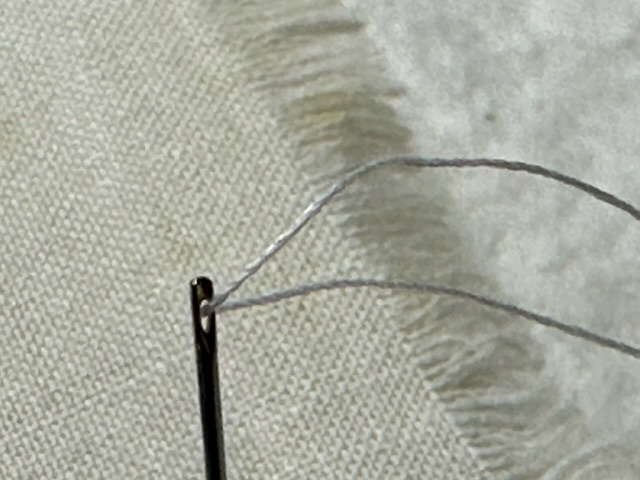
Today I went to visit Lu, my friend that is hand quilting my oldie quilt. It was time for me to get a little lesson in hand quilting.
She had started diagonal hashes, probably my favorite machine quilting method, and they looked spectacular!
She has several needles threaded and in various stages of quilting.
She used a 3” cutting template and a good old fashioned #2 pencil to draw the hash lines.
Next, hand quilting thread and a couple different needles. One had a bigger eye.
Lu showing me how to get started.
First lesson, hiding the knot.
The rose I hand quilted. It isn’t perfect, but I think it’s pretty good for my first real hand quilting in forty-plus-years. And bonus, I didn’t stitch the quilt to my jeans!!!
Isaiah 35:1 The wilderness and the solitary place shall be glad for them; and the desert shall rejoice, and blossom as the rose.
Once it’s quilted about 12”-14” all the way across, she’ll turn it using this cog for the next section.
She had ordered this Hinterberg quilt frame directions years ago and a friend made it for her.
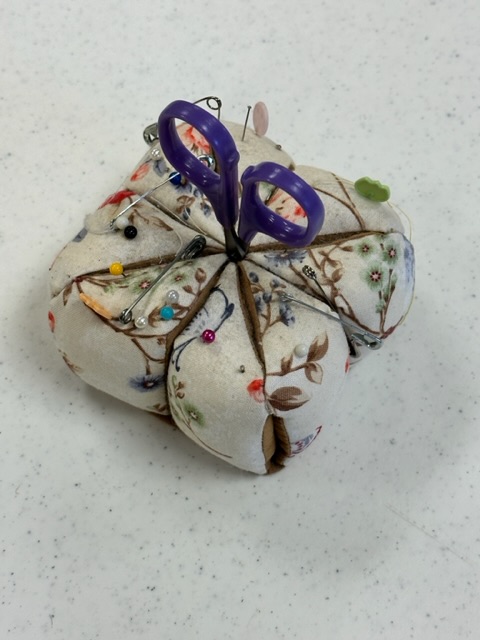
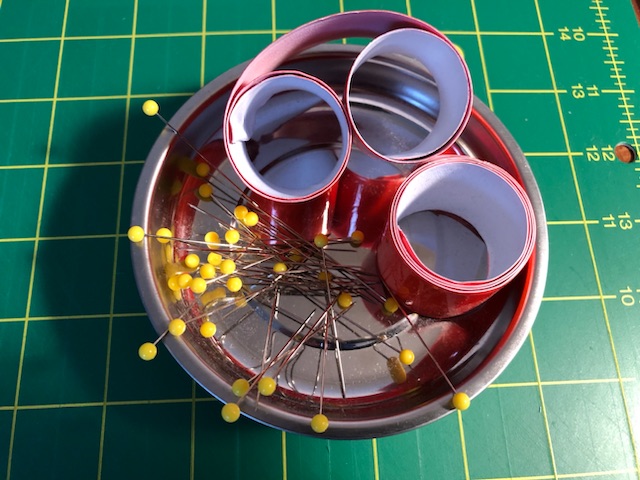
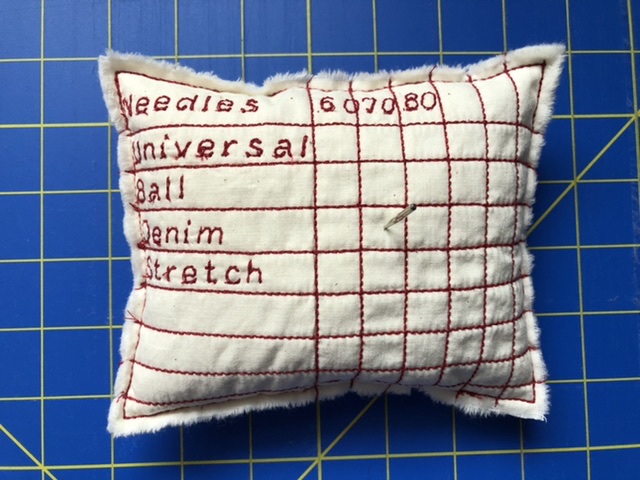
Pincushion ready to go.
My rose bushes still have buds and blooms. It was a lovely day.
Psalm 122:7-8 The LORD will keep you from all harm —he will watch over your life; the LORD will watch over your coming and going both now and forevermore.
Let July be July. I’d heard the phrase before but now, as usual, FB reads my thoughts and I’ve seen this poem several times. The month came in as June left, cloudy and rainy.
Independence Day started off foggy and cleared up. They predicted rain but it held off for our BBQ.
Galatians 5:13 You, my brothers and sisters, were called to be free. But do not use your freedom to indulge the flesh ; rather, serve one another humbly in love.
The Dog Days of Summer have begun!! July 3rd through August 11th, this period marks when the Sun aligns with Sirius, the Dog Star. In ancient times, people believed that this celestial event resulted in scorching hot weather when Sirius and the Sun worked together.
On the way home from our BBQ, I noticed these cumulus clouds. Wwwaaaayyyy back in the seventh grade our science teacher made us do oral reports on some science things. My topic was cumulus clouds. When the clouds start to rise up and become tall; like the one on the left; it means rain, perhaps even thunderstorms. Why should I have remembered this? If I remembered wrong it’s probably because I got a ‘D’ for the report. He didn’t think I was a very good teacher. What do you suppose was wrong with him??? Anyway, much to his chagrin, I went on to teach for years.
Even better, in this picture notice the potatoes are, ‘knee high on the Fourth of July.’
This is an old saying once used by farmers to measure the success of their corn crops—if it had grown knee-high by Independence Day, it was a good sign and meant they could count on high yields for the year.
Are you ready for another folklore? If it rains on July 1, expect rain for three weeks. So far it’s accurate. It rained on the 1st and has been raining 19 days of 21 in the three weeks. We did have a couple days of partial sun.
My father always used to say, ‘the rows will be meeting in the center by mid-month.’ Then the potato blossoms by the third week in July, our Potato Blossom Festival. The fields look spectacular!!
Potato Blossom Festival week, the third week in July, was also the week we filled this barn with hay. They were always the hottest days of the year. After all, you have to make hay when the sun shines!! My new neighbors that have the barn now use a conveyor to get the hay in the barn. We always had to throw the bales in from the truck into the haymow.
Ecclesiastes 10:2 The heart of the wise inclines to the right, but the heart of the fool to the left.
My grandmother used to say, ‘if it rains on St. Swithin’s Day, it will rain for forty-days.’ Have you heard that folklore before? It’s July 15th. I decided to google it. It does exist.
St. Swithin was a beloved ninth-century bishop of Winchester, England, who requested that he be buried in the churchyard—some say to be close to the common people, whom he loved; some say so that he could enjoy God’s gift of rain for all eternity. When he died in 862, his request was honored. About 100 years later, however, it was deemed unseemly that so holy a man should rest in a common grave. On July 15, the saint’s feast day, the people attempted to enshrine his remains in his church. Legend has it, however, that St. Swithin caused torrential rains to fall for 40 days, until the intended transfer was abandoned. This is the source of a very old Scottish weather proverb regarding rain on July 15: “St. Swithin’s Day if thou dost rain, / For forty days it will remain.”
It didn’t rain during my waking hours on St. Swithin’s Day, however it was predicted to rain, so it might have rained in the wee hours of the morning or after I went to bed. We’ve been in an El Niño weather pattern, so that’s why we’ve had so much rain this summer. Hopefully it didn’t rain on St. Swithin’s Day, we need a little break from all the rain this season.
Keeping caught up with my temperature squares. June 28, 29 & 30; and July squares up to July 17. My assembly line is working well!! The highs and one weather triangle representing the days it was raining; gray dots; overcast, cloudy and raining. Yes, it rained on July 1st and almost every day since.
On the 21st I was behind the first day of fall on a sunny day after almost three weeks of rain.
Proverbs 4:18 The path of the righteous is like the morning sun, shining ever brighter till the full light of day.
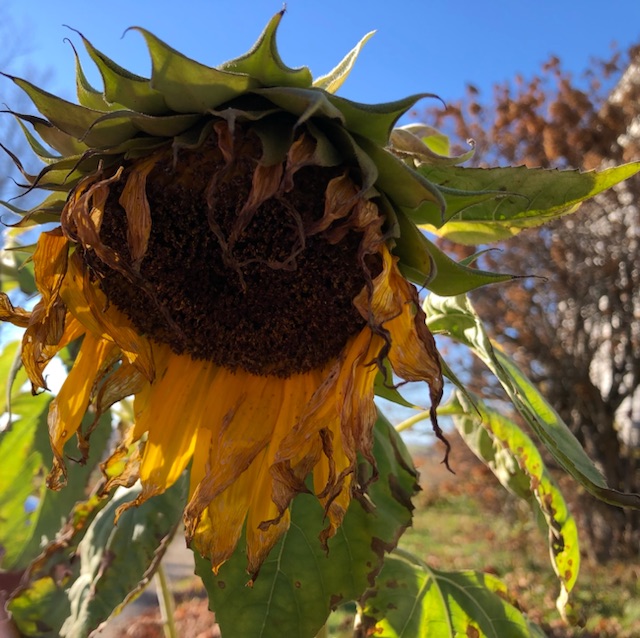
My sunflowers were behind schedule and with all the rain we’ve had you wouldn’t think they’d need more, but they did. A good drink and they perked back up!!
I had my moment in the sun during the Maine State Quilt Show. I could see it from a distance. My Thirty-Six Carat Diamond quilt was judged. It didn’t win any ribbons, or even a participation trophy, but that’s okay, it was an honor just to have it in the show with so many gorgeous quilts.
Before the end of the month, I got some new potatoes!! Delicious!! They are a meal by themselves!! A little butter, salt and pepper; there’s nothing better!! It’s like a little taste of heaven!!
Matthew 16:3 He replied, “You are good at reading the weather signs of the skies—red sky tonight means fair weather tomorrow; red sky in the morning means foul weather all day—but you can’t read the obvious signs of the times!
The evening of July 29th I captured a couple gorgeous sunsets as the month was coming to an end.
By the end of the month, it had rained 25 of the 31-days. Folklores working overtime!!
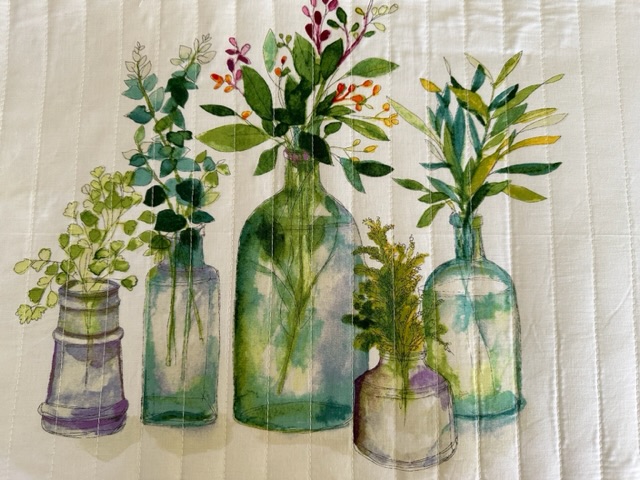
Recently I found this great watercolor bud vase fabric that I loved. It was a panel and I cut it into three sections. I didn’t know exactly what I was going to make, sew I started with machine quilting.
My favorite fabric store has vinyl in all these great colors. I quickly decided I’d make a tote bag with the newly quilted bud vases.
I used two of the sections for the bag.
Next, I had this fabric in my stash and used it for the lining.
I don’t really have a pattern for it. Years ago I cut apart a large grocery bag, the good old fashioned paper ones, and have modified it from time to time depending on the size I want to make. In this case, I made it as wide as the panel because I didn’t want to cut off any of the bud vases.
I used vinyl for the handles too. It’s going to be perfect for taking projects to Sew & Tell.
Isaiah 40:8 The grass withers, the flower fades, But the word of our God stands forever.
Recently I found this great animal fabric. I had to have it!! I didn’t really, but it was also on sale, sew I bought it.
Not long after getting it, my college roommate called and said her daughter was expecting her first baby. I knew they liked to hike and thought this fabric was perfect for a shower gift.
Proverbs 22:6 Train up a child in the way he should go, And when he is old he will not depart from it.
I started machine quilting pockets for a tote bag.
I decided to create lines like the tree bark.
More bark quilting. Different tree, different bark.
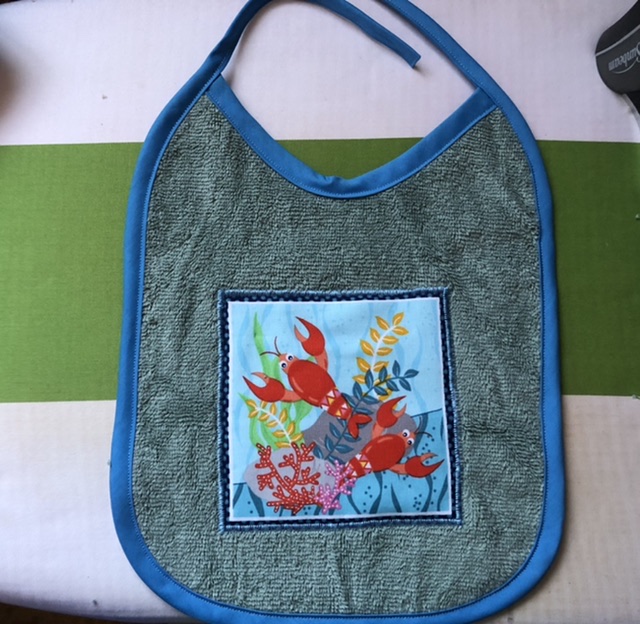
I found a perfect rusty-orange towel that matched the fox and squirrel squares for some bibs.
Sew, back to the quilt. I used my trusty painter’s tape to line up the hash lines.
Machine quilting right along. I did switch to a wider tape.
Almost done with the hash’s. Time for a coffee break.
Time for the binding. I like to press the seams open on bindings to reduce the bulk. Then I attach it on the back of the quilt first and turn to the right side to topstitch.
It came out great!! Maybe not your typical baby quilt, however I think they will love it!!
The tote bag looks great too!! Can you identify the different tree species?
Everything fits in perfectly!! Except the nuts!! I don’t know what those squirrels are looking for!!
Recently I had a chance to meet with my college roommate for a quick visit and delivered the gift. She sent a picture of the parents-to-be a couple weeks later. They LOVE it!!
Isaiah 40:4 Every valley shall be lifted up, and every mountain and hill be made low; the uneven ground shall become level, and the rough places a plain.
Yes!! West Quoddy Lighthouse. My friend was expecting a baby and the theme was nautical. Since we had lived in Lubec, I thought I’d make a West Quoddy Lighthouse baby quilt.
The most Eastern town in the United States, Lubec, Maine, where the sun rises first.
Psalm 104:25 There is the sea, vast and spacious, teeming with creatures beyond number— living things both large and small.
Machine quilting ocean waves. Don’t you just love the seagulls?
Almost done. A little puckering, but I’m not worried about it as it will ‘crinkle’ when it’s washed. I love the old fashioned look of how it’s used and loved.
Putting the binding on the back first and turning it to the front. One of the blogs I follow is always talking about winning the ‘binding chicken game.’ I get it!! I won!! I had about two inches left!! Yeahhh me!!
Next, a matching tote bag. I started with machine quilting both sides. I dug out my painters tape to machine quilt some hash lines.
All done. Wasn’t that quick?
For this bag I used vinyl for the bottom. I used my clips rather than pins to avoid holes in the vinyl.
I added a piece of the fabric to the webbing I used for the bottom of the pocket to give it a little extra bonus.
Before I trimmed the pocket, I lined up the pocket with the ocean blues. Yeahhh, it’s going to work the way I planned!!
Next, I sewed my fancy webbing onto the bottom of the pocket. Then I added the webbing for the handles, but forgot to get a picture.
I cut out about a 2” square for my box corners.
Ready for the lining.
Lining in and binding on.
Except for the blue fabric I used for the ocean; the lighthouse, clouds and seagulls are all one fabric. I fussy cut the lighthouses for the pockets and kept the seagulls flying around.
Some bibs. I threw in a couple other lighthouses that were in the border fabric.
A beautiful day for a rake picture.
Genesis 1:21 So God created the great creatures of the sea and every living thing with which the water teems and that moves about in it, according to their kinds, and every winged bird according to its kind. And God saw that it was good.
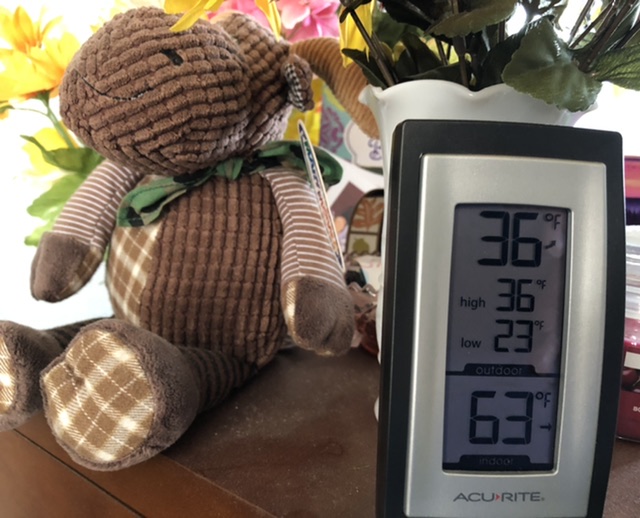
June 1st, 102 on my thermometer!! I expect it’s a little higher than what will be the actual high for the day, however it’s still quite hot out.
June 3, 2023 was a Full Strawberry Moon, however it was cold and cloudy so I didn’t get a picture. The temperature had dropped from 93° on the first to 63° on the third. I love my Maine weather. I did get a few Strawberry Moon pictures way back in 2019.
An old folklore says, ‘a dry May, a leaky (rainy) June.’ As I remember, May was quite dry. This rainy afternoon was the eighth day in a row of rain.
For my temperature squares, I was caught up with May. Yeahhh!! I don’t like getting too far behind because I think I’ll loose interest. Today 1 lined up three squares and trimmed off the dog ears.
Some trims.
An old folklore says, ‘When it is hottest in June, it will be coldest in the corresponding days of the next February.’ I’ll try to remember to check this out come February. Do you suppose that folklore suggests that I’ll be making another temperature quilt?!!
Flowers also predict the weather.
The common daisy will close its petals as rain approaches and not allow a single drop in; sometimes the petals will even droop downwards. When the weather if fair, however, they’ll keep their petals open. This happens because the upper surface of the petal grows faster at higher temperatures than the lower surface of the petals. Rain cools the temperatures, which encourages the underside to grow faster, and making the petals close up. The same thing happens at nighttime.
Matthew 16:3 He replied, “You are good at reading the weather signs of the skies—red sky tonight means fair weather tomorrow; red sky in the morning means foul weather all day—but you can’t read the obvious signs of the times!
Flag Day and Father’s Day came and went. Both were rainy, chilly and dreary. So cold that the furnace kicked in.
The first day of summer came with the sun and temperatures in the mid-eighties.
Finally, not a cloud in the sky!!
Despite all the rain, my lupine that Ash dug up for me, was multiplying.
My lilies were also coming out.
My one row plow took a beating last winter. My wildflowers are growing like weeds!! They desperately needed the heat. This day it was 85°. My lone strawberry, I probably won’t have enough to make jam this year.
I don’t know what kind of tree this is. Do you? I probably knew at one time, but can’t recall as I’m writing this post.
Psalms 1:3 And he shall be like a tree planted by the rivers of water, that bringeth forth his fruit in his season; his leaf also shall not wither; and whatsoever he doeth shall prosper.
It has these white, dandelion seed-like spores, that are blowing off.
It looks snowlike.
As I was getting some more temperature squares ready, I noticed this. Do you see it?
I missed a day. I had 4-10 and went to 4-12. I skipped 4-11. The thought occurred to me to just leave it, but I couldn’t. Sew I dug out my trusty seam ripper.
It isn’t a very high tech system, but it works!! Good old paper and pencil!! I would somehow manage to get behind and would do 10-15 squares at a time to catch up. I would write down the date, highs and lows, and any significant weather for the day.
Then I would go down the list and count all the high temperatures in one range and again with the low’s and have a pile for each day. An assembly line of sorts. Lastly, I crossed off the date once it was sewn. An arrow pointing right meant I still needed something for it, like maybe something to represent a birthday.
It actually was a quicker system than when I was doing 2-3 at a time. Probably how Ford figured out the assembly line!
Overall June was a rainy month, 22 of 30 days were rainy. I’m going to find a fabric to represent rainy, dreary days.
Proverbs 18:2Fools find no pleasure in understanding, but delight in airing their own opinions.
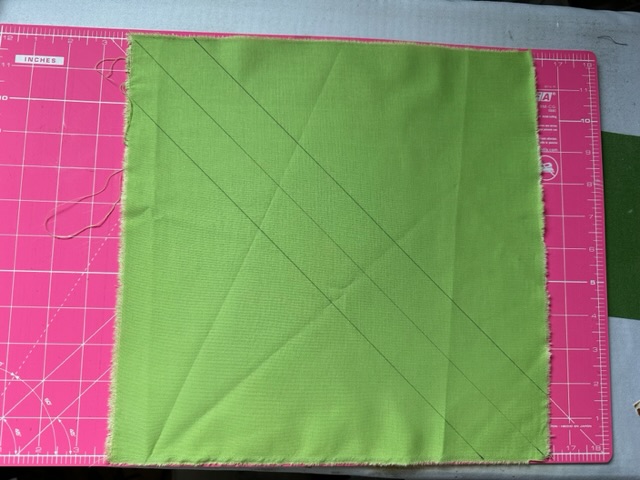
Today I started a new project. It starts with a diagonal line in the center and an 11/4” line on each side of the center. I just use my trusty good old fashioned #2 pencil.
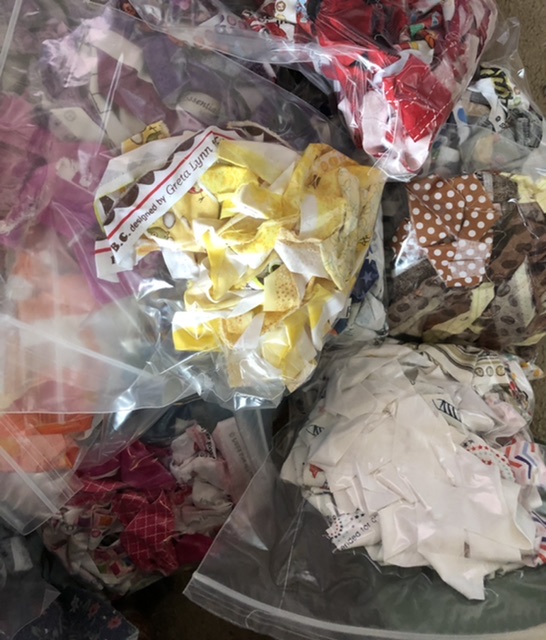
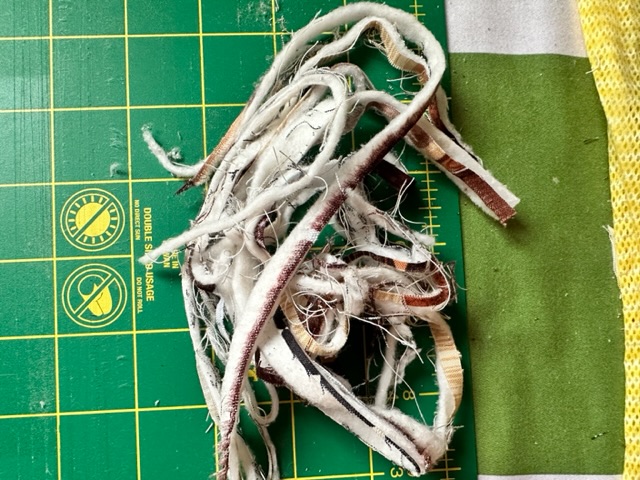
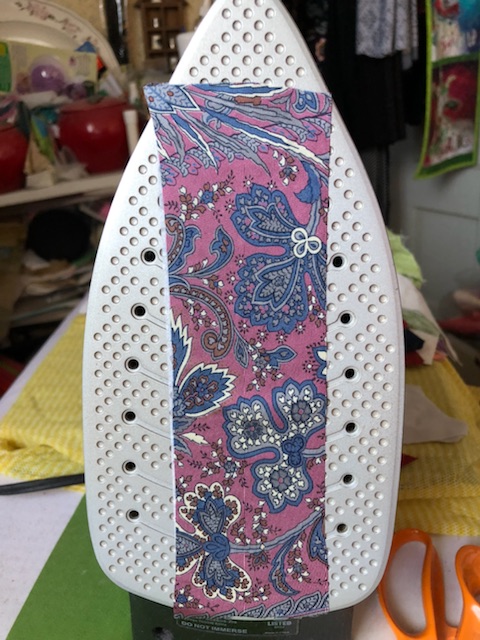
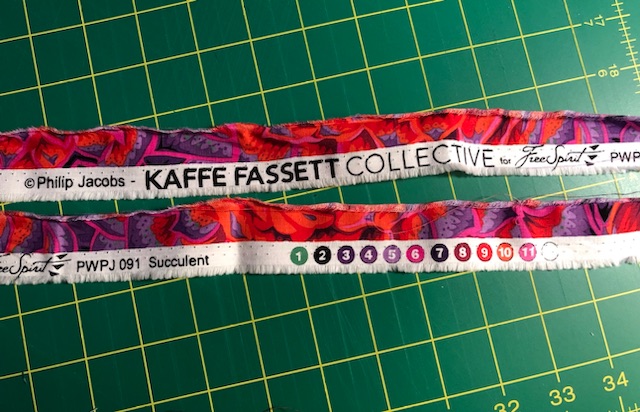
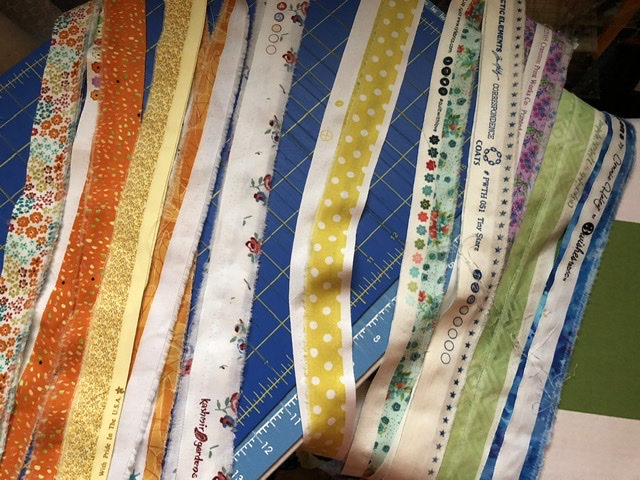
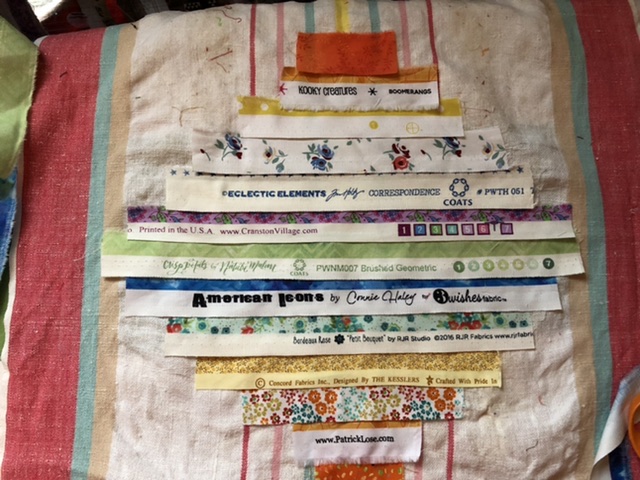
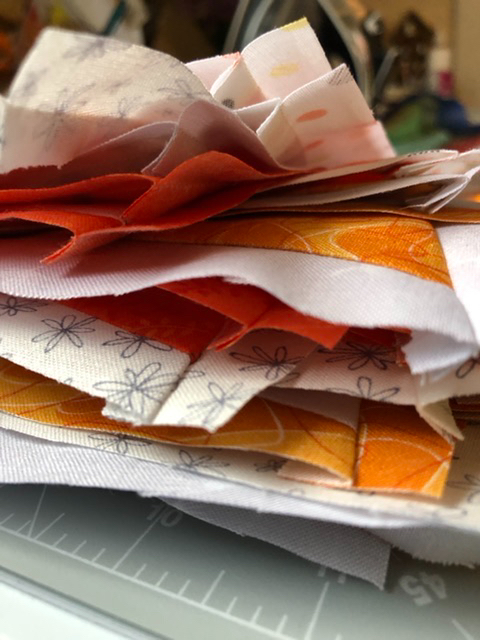
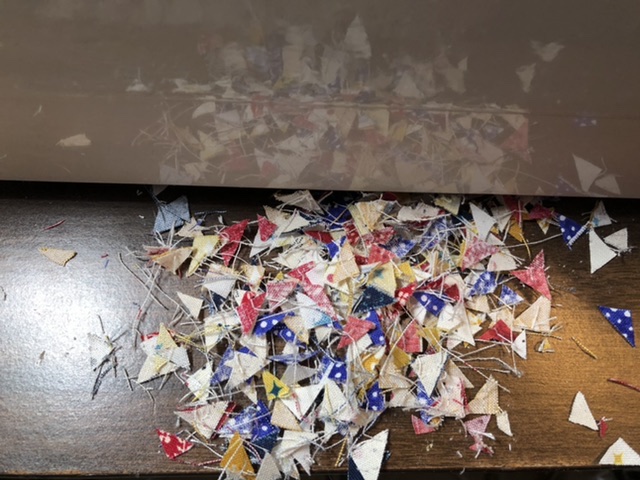
Is that a selvage? Yes!! It’s a selvage. I’ve been cutting off 11/4” of selvages for quite some time now. Usually one side has the fabric information and the other side is printed to the edge. I like both, I use the ones printed to the edge for small corners where the words or color dots would be cut off. First I lined it up with the second line centering my selvage information. The pattern calls for 95-yards of selvages!! I’m pretty sure I’ll have some selvages left over!!
Matthew 14:20 … And they took up twelve baskets full of the broken pieces (of fabric selvages) left over.
As I lined the selvages, I tried to make the best use of the wording and color dots leaving a 1/4” on the edges for trimming and the seam allowance. My plan for the center selvage is to use selvages that are unique designs. Also ones that are extra long and sew I can keep all the information.
For the most part, I selected selvages at random and mainly centered them.
I’m going to trim from the back. I didn’t think my background square pulled as much as it did, but I think it will be fine when it’s quilted.
Trimming and squaring up.
All trimmed.
“Are we there yet?” Almost, looks like I still need a few more blocks.
It looks like I have more selvages now than I began with!! I think they multiplied!!
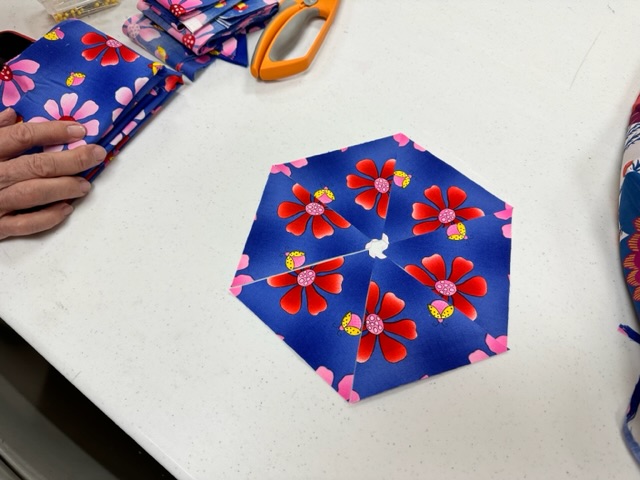
Time for a mock-up. I love it!!
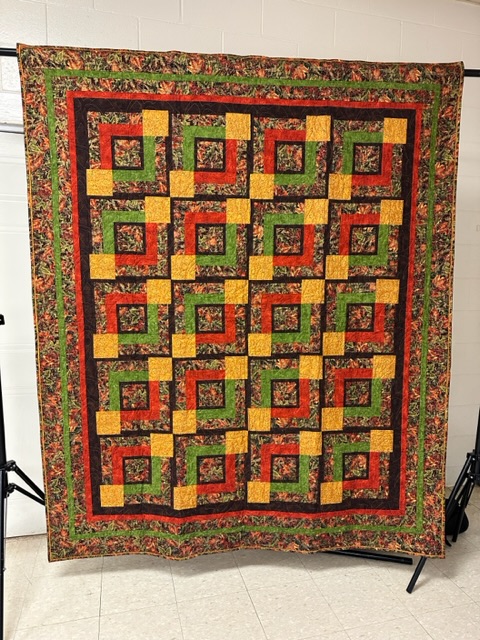
Rows together!! Wasn’t that quick? I’m calling it, ‘Lime Zest.’
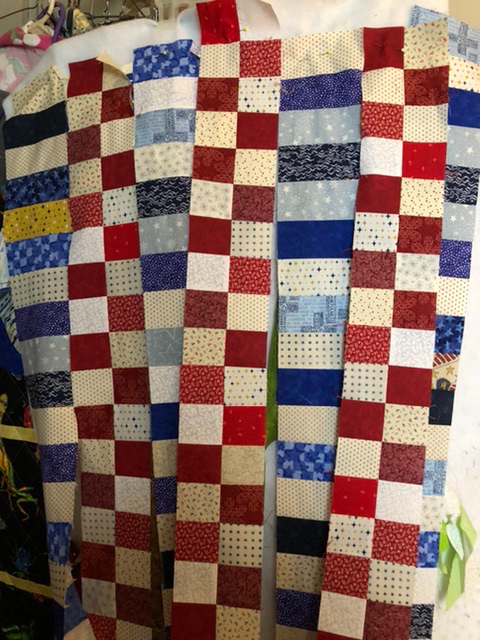
First though I had to finish the last clue, and trim my squares.
Then I began putting all the mystery pieces together. I was using my ironing board, but I really needed something bigger. I’ll start with the short rows.
Row one.
Making sure my stitch crosses where the seam meets.
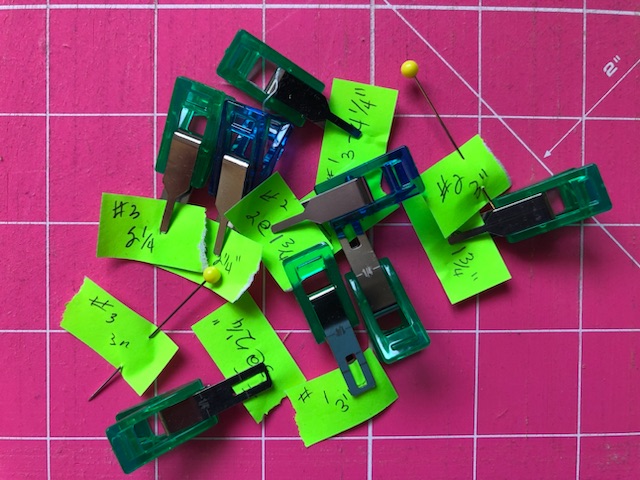
Sewing right along. Row 4. If you’re new to the blog, I wrote numbers on my flathead pins to use for row markers. You can buy them all numbered, however they are quite expensive.
I had to make some more numbered pins for my rows.
Next I had to fold the pattern sew I could stay on the right row!!
Then I had to take it one gumshoe step further. I had to put a pin in each square as I lined up the row.
1 Thessalonians 5:11 Therefore encourage one another and build one another up, just as you are doing.
I went out for recess to meet some of my high school classmates for lunch.
One of the girls brought some rhubarb for any of us that wanted some. I made a Strawberry Rhubarb Pie.
I only wanted a couple stalks, but she gave me a few extra.
I made some strawberry rhubarb sauce.
Sew, back to the mystery quilt. Cornerstones in.
Squaring up.
Borders on. Ready for the long-armer.
Colossians 1:26 that is, the mystery which has been hidden from the past ages and generations, but has now been manifested to His saints,
Today at the guild meeting the first thing I noticed was the 2023 raffle quilt on display. Isn’t it lovely?
The next thing I saw was a finished mystery quilt.
I was somewhat right in my guess that the squares would make stars. I’m looking forward to finishing mine.
Another table had our diamond challenge displayed. It’s on its way to the Maine State Quilt Show in July. Each diamond had to include at least one piece of an old silk necktie. My Diamond and Silk is the rosy pinkish one.
Since we don’t meet in July, we decided to have a potluck salad bar.
Bring your own plate, flatware and dressing. I brought my new favorite Robust Garlic and Parmigiana salad dressing. Notice what a great bargain it was!! I bought all they had left on the shelf!! It was a wonderful variety of salad items and a great hit!!
Matthew 14:19 Ordering the people to sit down on the grass, He took the five loaves and the two fish, and looking up toward heaven, He blessed the food, and breaking the loaves He gave them to the disciples, and the disciples gave them to the crowds,
The Demonstration
After a brief business meeting, it was time for the demonstration and it was my turn this month. Here’s a little recap … in case you missed it. I recently bought a bundle of batting at my favorite store. It’s not identified as to what the fiber content is, they just cut various lengths and tie them with ribbon, yardage and price. One time a bundle was wrapped in plastic and written on it, ‘100% wool.’ Occasionally I see batting similarly wrapped at a local thrift shop. I decided a good demo might be a fabric wash and burn test.
I started with four batting types that I had on hand and knew the fiber content. I cut a 4” square of each. Then I machined quilted them to muslin and washed them in hot water. Wool typically shrinks when washed in hot water, but this batting didn’t shrink. The 100% polyester was the only one that crinkled up during the wash. If you are familiar with fibers, you know that polyester will melt at high temperatures. So that’s basically what it did in my hot water wash.
I also showed the battings and several different fabrics that I did a burn test. Sometimes you get fabric at garage sales or from friends that know you sew, but you might not know the fiber content. Most quilters prefer 100% cotton fabrics.
The animal fibers, wool and silk, will start to burn, but go out quickly. They also will smell like hair being singed.
Plant fibers, cotton and linen, will burn and you can check the remains of the burn, it will feel and look like ashes. In blends, 80% cotton, 20% (50%/50%, etc.) polyester, it will still burn, but you will have little melted beads with the ashes.
Polyesters, acrylics, nylon, spandex and like fabrics will melt when burned. The ends will ball up like small beads or bb’s.
The flames, colors and smells of each fabric are different. Sometimes even if you know the fabric is 100% cotton, it will burn quickly. This is probably because the fabric has been treated with chemicals during processing, such as sizing or permanent press treatments.
If you’ve never done a burn test before, be sure to do it safely. I usually use about a 2” square and hold it over my sink so I can drop it in water if needed. Also, start with fabrics you know the fiber content and get used to the burn characteristics, that way you’ll know if a fabric acts strangely during a burn test.
Here’s an excellent video on different types of batting and how they act when washed, that I forgot to mention during the demo.
I gave members a couple resources that I wrote on my portable faux whiteboard a couple of links for the members if anyone wanted more information or a printable chart.
I also gave them a little bonus tip about the Robert Kaufman, The Quilter’s Little Helper, a quilting calculator app. It figures sizes for half square triangles, backing and binding amounts, you just put in your measurements. If you don’t have it, it’s a must!! And it’s free!!
Sew & Tell
First up, a diamond for the silk diamond challenge.
Scraps for the stars. The back and her label. You can’t see it well, but the label is masking tape.
Next, a Quilt of Valor for a veteran. It’s a free pattern from Jordan Fabrics called Baby Steps. She’s going to present it to him on the Fourth of July.
This lady made her own pattern for this quilt top that’s on its way to the long-armer.
This Strawberry Quilt is going to the aunt of woman on the right. She hand stitched 150 French knots for seeds on the strawberries. She used to visit her during strawberry season.
This quilt is called Hot Shot.
I showed my finished Thirty-Six Carat Diamond. It was rolled and pinned on a pool noodle for delivery to the Maine State Quilt Show. They say it’s supposed to help prevent fold lines. I also showed a secret project that’s a gift so I’ll post it later.
Proverbs 27:17 As iron sharpens iron, so a friend sharpens a friend.
The raffle quilt will be displayed at our local quilt show at Daigle’s Furniture Store during our quilt show in August. Members each received tickets for it, so if anyone is interested in getting some, let me know. They are $1.00 each or a book of six for $5.00.
I won the high stakes quilting 50/50 gambling lottery!! What to get?!? More fabric of course!!
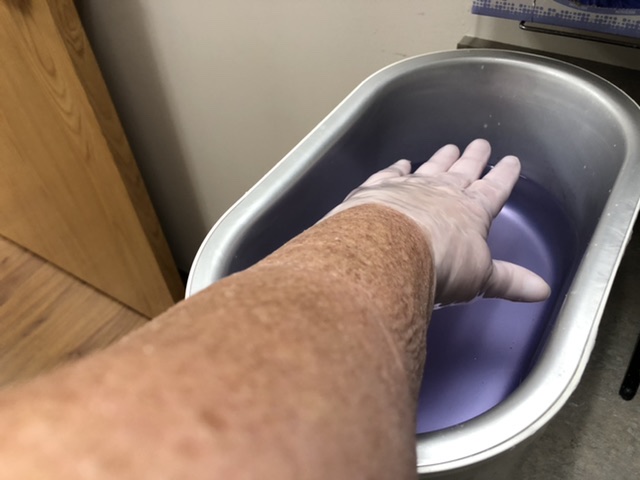
What do we have here? If your guess is a reflection of my ceiling, you’d be right.
It’s not always that I pre-wash my fabric before I start cutting and sewing, however sometimes with darker fabrics, I will at least soak them in the sink. The picture doesn’t really show just how much purple dye came out.
It’s usually the navy, reds and blacks that I’ll pre-wash. If you happened to have washed something and the colors run, there is a little hope to get rid of the bleeding color.
BEFORE putting the item in the dryer and it (the bleeding) getting heat set, you can re-wash using Color Catchers. Some of the quilt blogs I follow suggest using more than one in each load. You might also have to wash the item(s) several times before the dye is gone. All washings must be done before you dry the item.
There are a few other ways to prevent the bleeding. Again, BEFORE using the fabric, you can ‘set’ the dye like my grandmother and mother used to do, adding 1/2 cup of white vinegar to the wash cycle. You could also use 1/2 cup of baking soda OR, 1/2 cup of salt to the wash cycle. I especially remember my mother using white vinegar with new blue jeans. I don’t know why, but it worked.
Exodus 35:23 Every man, who had in his possession blue and purple and scarlet material and fine linen and goats’ hair and rams’ skins dyed red and porpoise skins, brought them.
Today I put my gumshoes on and tackled the next clue.
First some more crosscuts.
E and F.
Sides on. Pressed. Recycled tags, just in case.
Next, the four-patch mystery. I read the clue twice to make sure I had the four-patch in the right direction.
I need twenty-four.
What do we have here? I didn’t come out even. It’s a mystery.
Ready to press.
My four-patches look like houses. I don’t think they will stay that way.
A #1 HST on the opposite side.
I came out even on this one.
The new unit with my recycled tags. These guys are ‘X.’
These guys are ‘Y.’ Do you see any difference?
I’m caught up and waiting on my next clue. Stay tuned.
Luke 8:10 And He said, “To you it has been granted to know the mysteries of the kingdom of God, but to the rest it is in parables, so that seeing they may not see, and hearing they may not understand.
If you’re following the Mystery Quilt project, I recycled my post-it tags to my recently sewn mystery strip sets. A, B, C, D, E and F. I’m glad I did, otherwise I’d be in a messy mystery.
We got two clues in March. This was actually clue #3. Crosscuts.
My ‘A’ cuts.
That was close. A 1/4” to spare.
B cuts.
Ephesians 1:9 And He has made known to us the mystery of His will according to His good pleasure, which He purposed in Christ
The success of your quilt depends upon accurate 1/4” seam allowances.
Strip set ‘A.’
‘B’
A couple more strip sets.
I put my sleuth hat on and I’m thinking maybe these two strip sets will end up being four-patches. Time will tell.
I’m glad I tagged everything, it might have been confusing otherwise.
Colossians 2:2 that their hearts may be encouraged, having been knit together in love, and attaining to all the wealth that comes from the full assurance of understanding, resulting in a true knowledge of God’s mystery, that is, Christ Himself,
Back in September, at the Guild meeting, everyone submitted ideas for projects, group or individual. One idea suggested by several was a Mystery Quilt. A couple months ago at the Guild meeting we got our first Mystery Quilt clue. I’m just now getting around to starting it.
I put my gumshoes on and was ready to tackle the first clue. Shopping.
Beginning with fabric selection, without knowing what the quilt will look like finished, this should be interesting. The pattern calls for three fabrics, a light, medium and dark. Since bright and bold colors are showing up in a lot of the blogs I follow, I thought I’d try something a little bit different.
Cutting color #1.
I had to dig out my post it’s to keep track of all the clues. I think Jessica Fletcher keeps all the clues in her head.
Color #2 cuts.
All three colors cut and tagged.
I don’t believe I’ve ever cut all the pieces for a quilt all at once before. I usually cut as I go. A little different for me.
Sew far, sew good.
Mark 4:11 And He was saying to them, “To you has been given the mystery of the kingdom of God, but those who are outside get everything in parables
Remember this? I was putting interfacing on the wrong side of some silk ties that I posted about recently. A couple of my peeps asked about how I cleaned my iron.
The interfaced tie wasn’t actually stuck to the iron as it looks (and would you believe I have done it a few times over the years?,) it was staying on by static cling. Maybe in part because of this iron, it’s Areo Ceramic. It’s the first iron of its kind that I’ve had, but I like it.
In the past I have used this Dritz iron cleaner. Dust? What dust? Okay, sew maybe it’s been a decade or two since I’ve had to clean my iron.
From the silk necktie on my iron, I cut it into diamonds for the guild challenge. I machine quilted the wall hanging using the diamonds as my guide. I’m a little disappointed with them because they don’t line up straight. I decided to go with it as is since I was on a time constraint.
At a distance, it looks pretty good.
I put the binding on the back first.
Next I turn it to the front, or the right side, and topstitch.
It’s been a day or two, or ten, since I cleaned the dust balls out of the bobbin case. A little oil and I should be good for another 100K stitches.
Proverbs 31:22 “She maketh herself coverings [wall hangings] of tapestry; her clothing is silk and purple.”
I took it to Sew and Tell for the last guild meeting.
Typically I don’t like flippy corners much because they waste a lot of fabric depending on the size.
I was able to use some of the flippy corner cuts for the petal squares.
Squaring up.
Stem added.
My pile of flippy corner’s that I might be able to use for something.
Petals ready.
Squared up.
Machine quilting using my painters tape as a guide. I also rolled and unrolled both sides as I went along. Works well since it’s a runner and not overly wide.
Luke 12:27-28 Consider the lilies [tulips,] how they grow: they neither toil nor spin; but I tell you, not even Solomon in all his glory clothed himself like one of these. But if God so clothes the grass in the field, which is alive today and tomorrow is thrown into the furnace, how much more will He clothe you? You men of little faith!
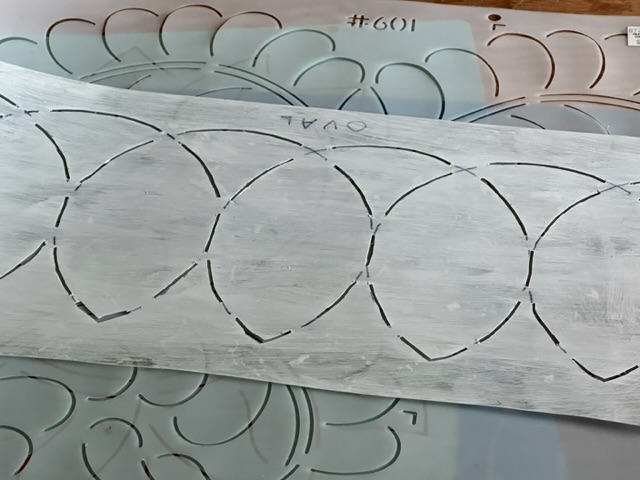
At the last Guild meeting you might remember someone brought in quilt books, magazines and tools to giveaway. Among other things, I picked up this ruler and book. I decided to make this quilt on the cover.
Using the same square, the book has patterns for several designs depending on how you turn the squares. A couple patterns have an additional square as in the last picture.
Exodus 25:9 According to all that I am going to show you, as the pattern of the tabernacle and the pattern of all its furniture, just so you shall construct it.
The one I’m making has just one square, made two ways. One mainly dark and one mainly light.
I cut and set them up in lights and darks. Normally I would chain stitch, but decided to do these individually.
My semi-organized cuts and a pile of light and dark squares.
My stack of light and dark squares ready to be trimmed.
All trimmed. That was quick. Sometimes it amazes me how a little trim on one square adds up to so much. You don’t realize how much the fabric moves during sewing and pressing. Definitely makes putting the squares into rows easier.
I started in the middle!! I might regret it, however I think I’ll be able to add the next squares on each end without too much trouble.
I used my flathead pins that I wrote numbers on with a sharpie to keep my partial rows in order.
I kept some of my numbered pins in so I wouldn’t flip the row.
Because I put the center lights together first, I put the rest together in quadrants. One more to go.
Today I was using my table as my design wall so my last quadrant was the lower left corner, or nearly on the floor. I flipped the top and flipped the book sew I was looking at the pattern in the right direction.
The book calls it Octopus Garden. I don’t really see it. I’ll put my thinking cap on and see if I can think of something I like better.
Psalm 85:6 Will You not Yourself revive us again, That Your people may rejoice in You?
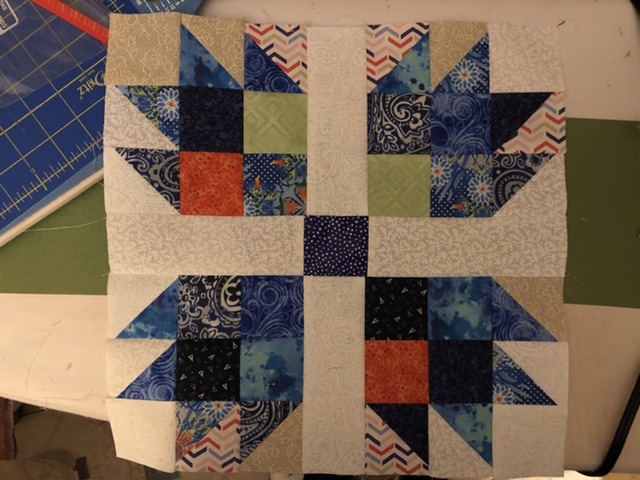
My favorite fabric store has had a few Kaffe Fassett fabrics lately, and by lately, I mean the last 4-5 years. I’ve been getting a yard here and there as I find one I like.
One piece I got was this one with large florals, sew I ‘fussy-cut’ some flowers to get started. Typically I don’t like fussy-cuts much because you loose fabric around the cut. I’m not one to waste fabrics. The waste looks wide enough that I might be able to use it somehow.
This is another reason why I’m fussy about fussy-cuts. I use my rotating cutting board to turn for cutting each side of the square. With each quarter turn, the rest of the fabric is pulled around, and sometimes in the way, and sometimes I need to readjust my square.
Next I framed each flower with a bright black and white.
First mock-up.
A few Fassett selvages.
I started a couple rows.
Changed my mind, I’m told I can do that. I added to the rows and length. I’m still in think mode as to whether or not I should add borders.
Psalm 85:6 Will You not Yourself revive us again, That Your people may rejoice in You?
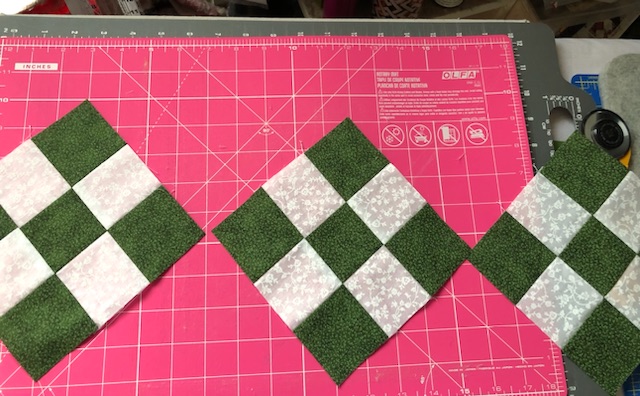
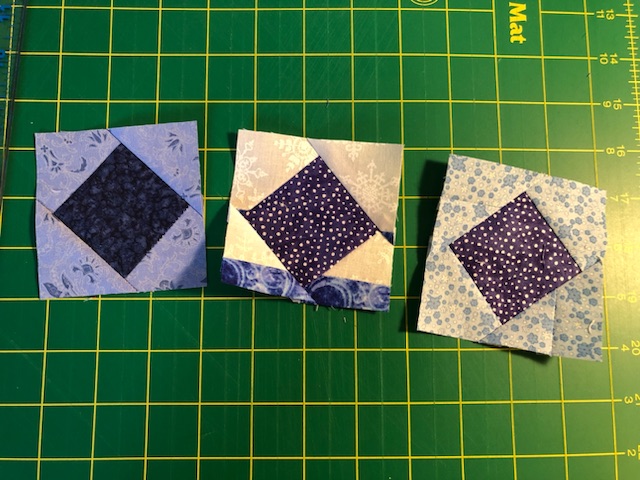
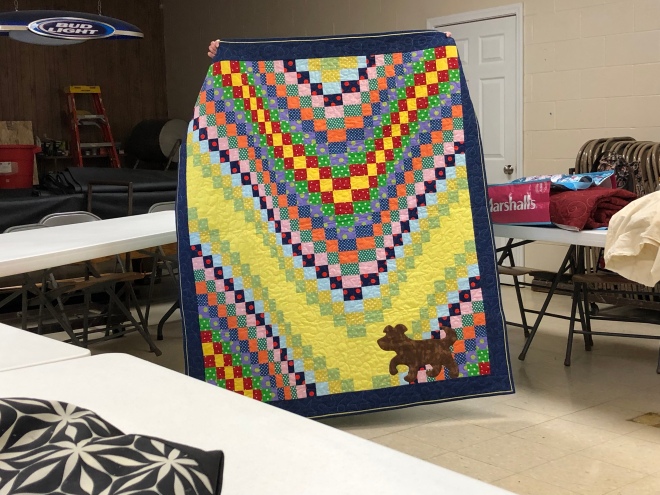
Today I made a few nine-patches. FYI, a very basic square if you are just starting to quilt.
Santa brought me a new ruler in my Christmas stocking this year. It’s a great size. I love it!!
Since I was planning to put the nine-patches on point, I needed setting triangles and corner triangles. I did some ‘goes-in-tas,’ good old fashioned math, to figure out what size to cut.
Setting triangles cut and ready to go.
Recently I discovered a quilting calculator app. I don’t download many apps, but decided to give this one a fighting chance. I LOVE it!! It did my goes-in-tas in a split second!! Bonus, it was right … since I had come up with the same figures first.
I tried to put a link in for it, but couldn’t get it to work. Just search the apps for quilting calculator and the one I selected is Robert Kaufman, Quilter’s Little Helper. It’s great!! Figures yardage needed for backings, binding, triangles and more.
Lining up the triangles.
Triangles in and border on.
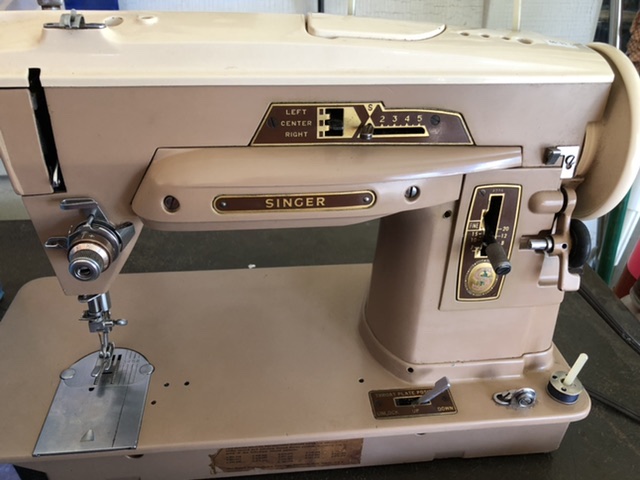
My regular machine was acting up so I brought out my old Singer to get the binding on.
Machine quilted and bound.
The back. Or front. A few shamrocks for St. Patrick’s Day.
I made two. The longer one, also reversible. About 10” to hang over the sides.
It’s lovely.
Matthew 6:33 But seek first His kingdom and His righteousness, and all these things will be added to you.
The other evening the sunset was so spectacular!! All the colors reminded me of my guild sew day project, a Bargello quilt.
Bargello is Latin for frustration. Well not really, but when I was working on this pattern for my sew day project, I couldn’t for the life of me figure out the pattern directions. Someone tried to explain it to me only to make it worse.
I got it out, pressed it again and remembered one reason why it was frustrating.
The directions had you sew twelve strips together.
Then, it says to remove the darkest strip from the top strip set?!? Ugg!! Why didn’t they write, sew all strips together except the darkest one????
Isaiah 41:10 So do not fear, for I am with you; do not be dismayed, for I am your God. I will strengthen you and help you; I will uphold you with my righteous right hand.
After I removed the strip, I decided to go more on instinct than the directions. Next, you fold the whole thing right sides together and stitch a seam on the length creating a tube. It seams awkward, however I had done something similar a while back and understood where it was going.
Or a circle.
You cut the entire tube into strips in various widths. These are 1” to 3”.
Next, take out a seam so you have one long strip. Move the next circle up one color and remove the seam. The same for the next strips. Yeahhh!! The pattern is beginning to show up!!
I had to pull out all my weights to hold the strips in place. I double checked each strip by lining it up (strip on the right) to make sure of the seam I needed to remove. Along the way, you reverse the seam you remove so the pattern moves in the opposite direction.
I sewed about four or five strips together and pressed them all to one side. Then I sewed them together adding one set to keep it manageable.
I think I had six strip sets.
Bargello actually means ‘a straight stitch worked in a high and low relief pattern to form a variety of zigzag or oblique designs.’
I can’t decide if I like it better right side up or upside down. After all the frustration, it looks amazing either way.
Sew far I’ve managed to keep up with each day during the month of January for my temperature quilt. I used these sewing clips to hold the squares and keep them in order.
First row of twenty days. I decided to make it 20 x 20. That will give me a few extra squares for my temperature key.
My birthday squares are balloons, but they don’t show up quite the way I wanted because the design is too big. Pay no attention to my well used ironing board cover.
I like the birthday candles better!! This square also has a snowflake fabric to represent there was light snow that day.
I threw caution to the wind and decided to use these bright blacks as a spacer for each month.
To keep my days in order, I penciled the date on the seam allowance. It also helped that I had them clipped together, especially the darker seams.
Sew far, sew good!! Stay tuned.
Matthew 16:3 He replied, “You are good at reading the weather signs of the skies—red sky tonight means fair weather tomorrow; red sky in the morning means foul weather all day—but you can’t read the obvious signs of the times!
Psalm 54:2 Hear my prayer, O God; give ear to the words of my mouth.
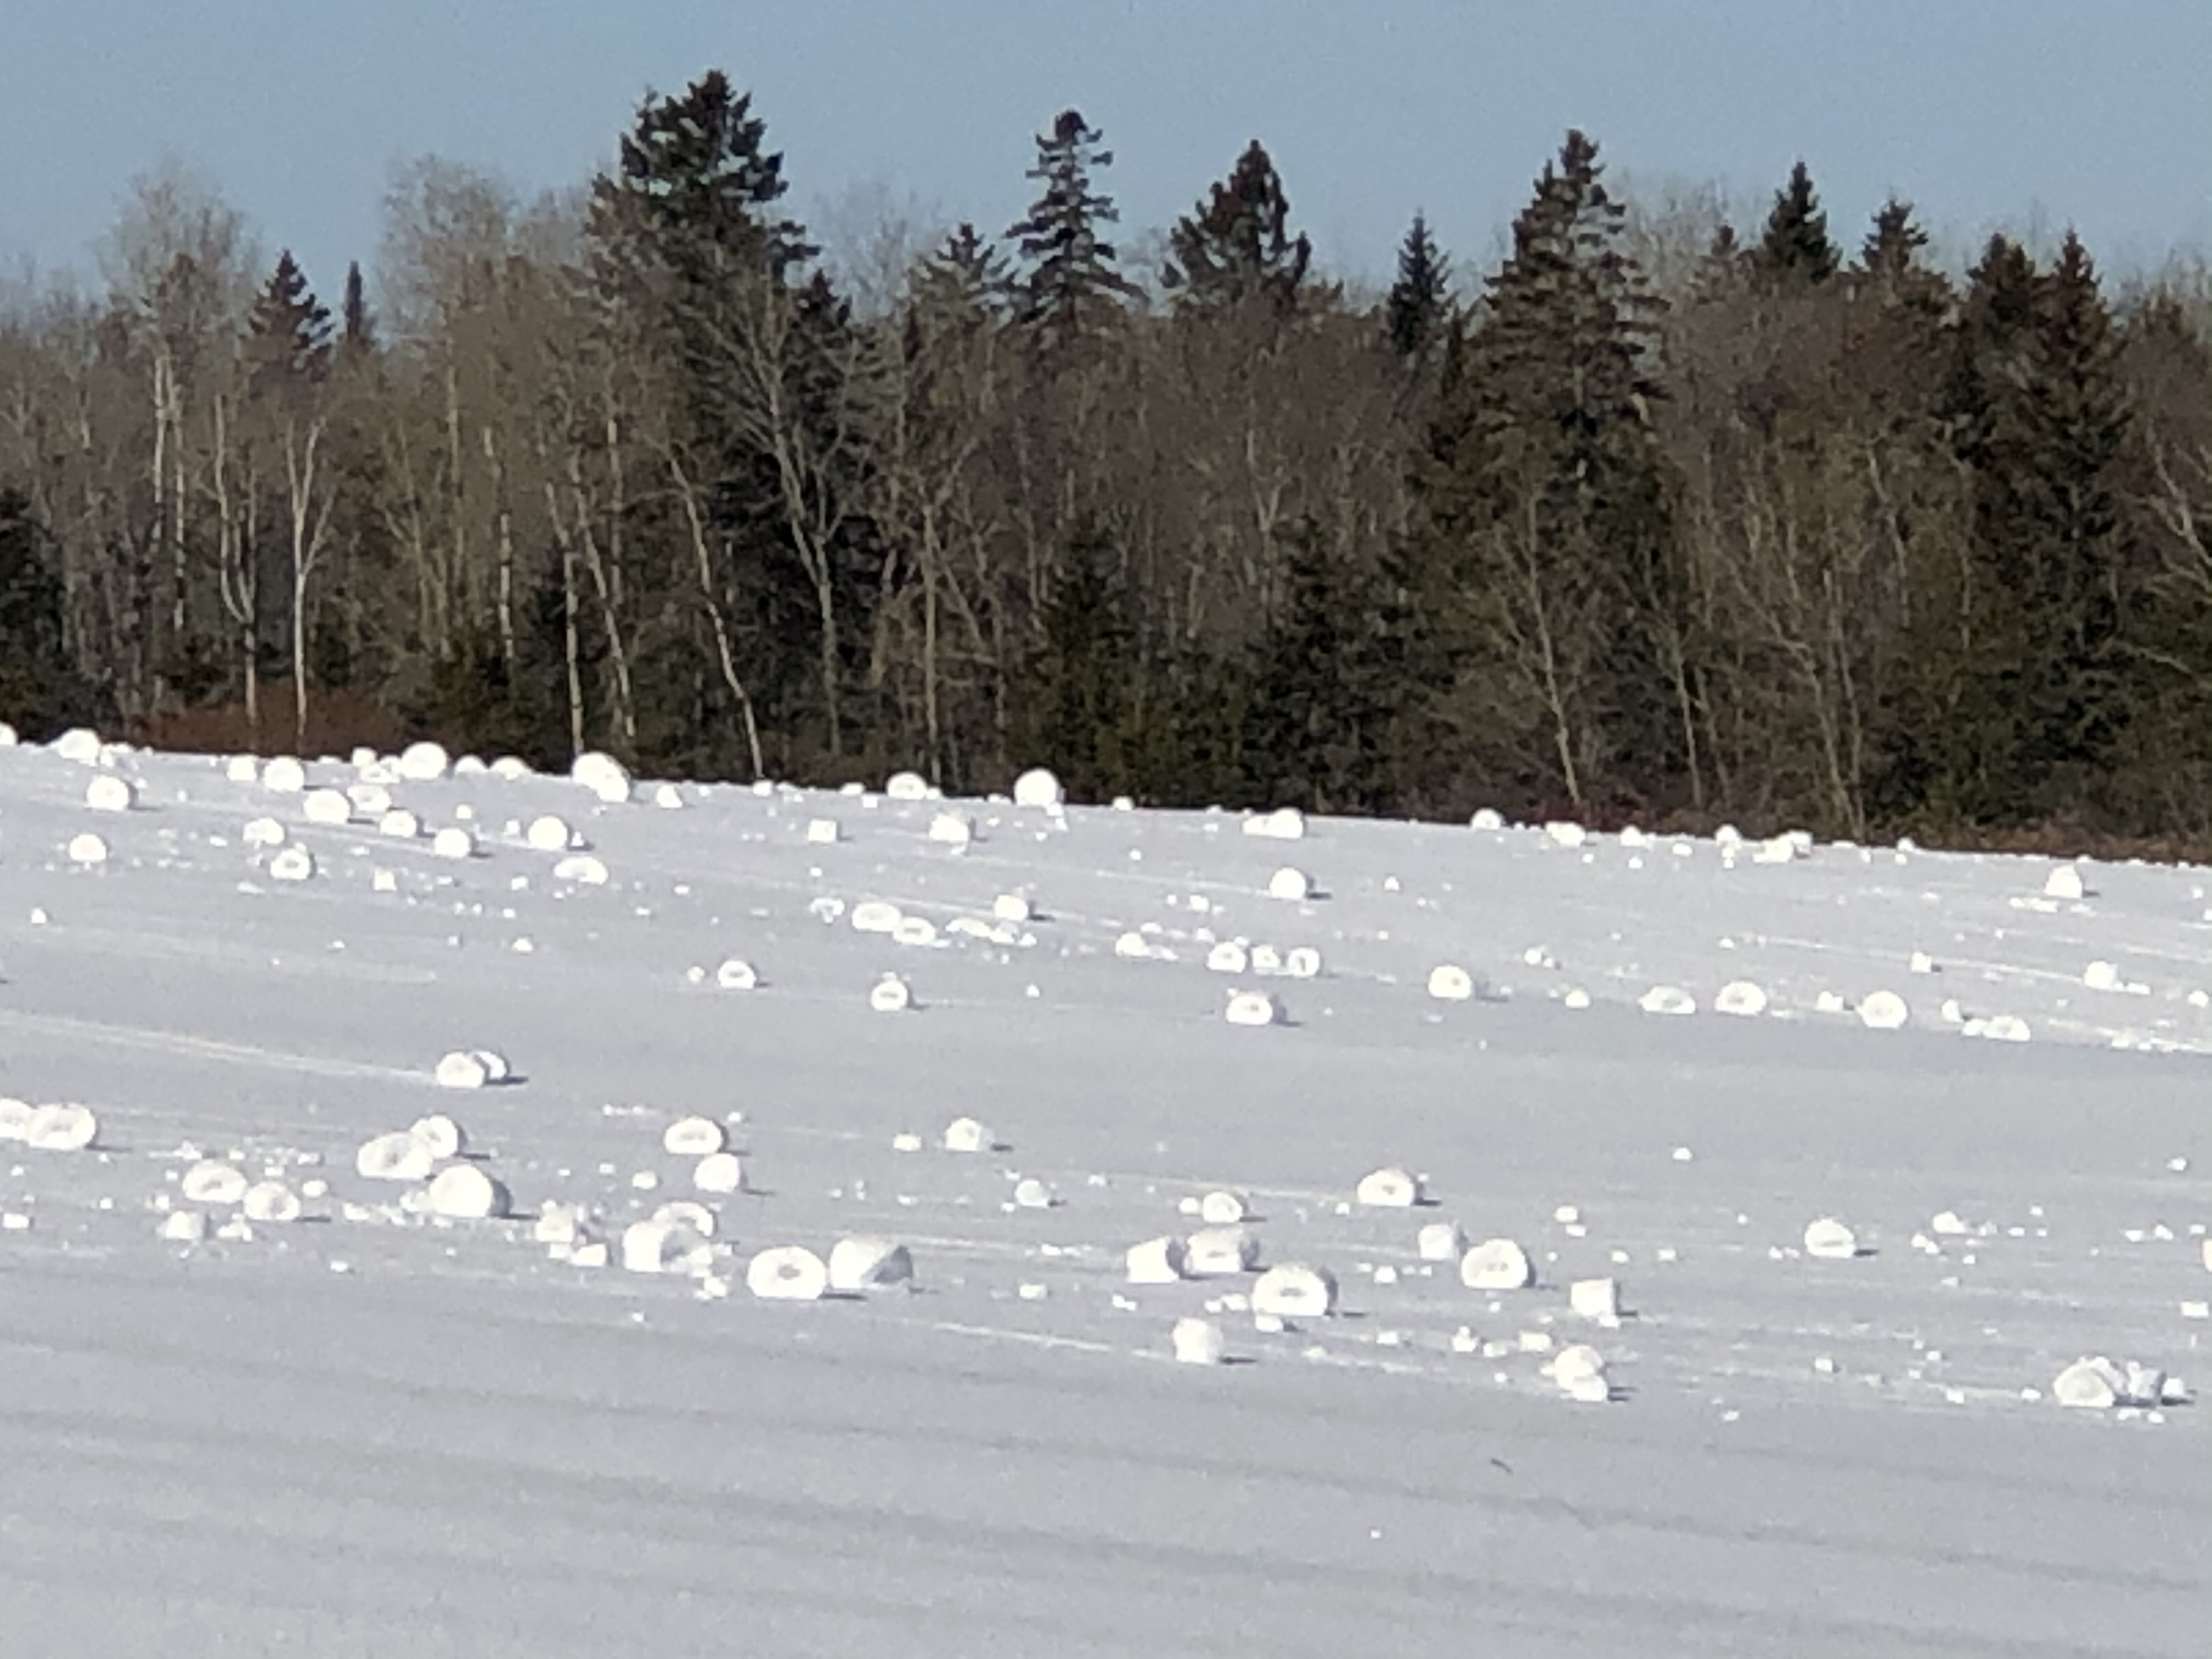
A couple years ago I got this great picture of snow rollers. Our weatherman at the time explained how the temperature and winds make the snow rollers.
For Christmas this year I put a laser light on my wishlist. Our wishlist is just that, a wishlist. You may or may not get what’s on it, but it’s an option. The kids got me one!!
I mainly wanted it to use to keep my machine quilting lines straight. Or relatively straight. For this heart runner, I was quilting a 2” grid. It was a perfect time to try my new tool.
First mini challenge was lining up the laser with the seams to get a straight line versus a line with a little diagonal to it.
The light has a movable cord to get it lined up. I had to turn off my regular light I use when sewing because it was too bright and I couldn’t see the laser. Even with the light off, sometimes it was hard to see the laser depending on the fabric colors. I was thinking it should come with a couple more color options. Blue or green might have worked better against the reds.
I put the box on top of my machine. For now. It’s a little bit in the way when I need to wind the bobbin or thread the machine. Of course part of it is my brain being a creature of habit.
1 John 4:16 “God is love; whoever abides in love abides in God, and God in him.”
There’s a lot more going on in the sewing room than just stitching seams.
Sometimes there’s a little problem. Sew, I was sewing a binding on and the stitches kept skipping.
I had just cleaned out the dust balls recently, but decided maybe that was the problem. I’m thinking it was longer ago than I thought for the last cleaning?!?
Yes, lots of dust balls. There have been times when there was more.
I changed the needle and re-threaded only to get this.
I changed the thread. Finally got the stitches back to normal.
In other news, I love these magnetic pin cups. Some people call them nut cups.
Mainly needles.
More needles.
Pins and fabric clips. I really like the fabric clips and some of them have a little metal in them.
1 Corinthians 15:33 Do not be deceived: “Bad company corrupts good morals.”
… and I was Just Chillin’ in my sweat shop, AKA my sewing room, with these guys.
Snow on the pinwheels. I’ve been making my table runners reversible for a while, usually when I think of something for the back. This time, I found these snowmen panels and coordinating fabrics. I had to get them!! My favorite fabric store is salvage fabrics and doesn’t always get the other fabrics in the series.
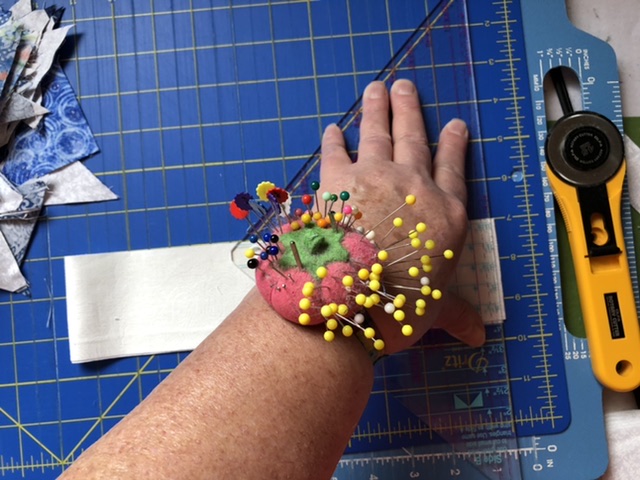
I number some of my flathead pins with a sharpie and use them to keep my rows in order. I’ve seen numbered pins in my quilting catalogs, but I’m too cheap to buy them. They are kind of expensive.
I had the snowmen in a specific order. I’ve mentioned it before, I like to rotate directional panels so that some are right-side-up no matter which side if the table you might sit.
The snowy pinwheels direction didn’t matter as much, but I tried to mix up the color combinations.
Do you see it? No, not the dust. I ran out of thread with three hashlines left. I hand wound some bobbin thread back onto the spool. I ended up with about twelve inches of thread left.
Time for the binding.
Snowplace like home.
Snow ready.
Isaiah 55:10 “For as the rain and the snow come down from heaven, And do not return there without watering the earth And making it bear and sprout, And furnishing seed to the sower and bread to the eater;
The other day I found these gnomes and I knew exactly what I would make and who would love them.
In case you are wondering where you can find the gnomes, here’s some selvage information. Gnome-antics by Jennifer Pugh http://www.wilmingtonprints.com
The fabric was off grain. Kind of typical for panels.
GNot to worry. Pull both of the opposite short corners on the bias a couple times.
That’s better. Not quite perfect, but I can handle it.
I straightened them individually, but I could have done the entire panel.
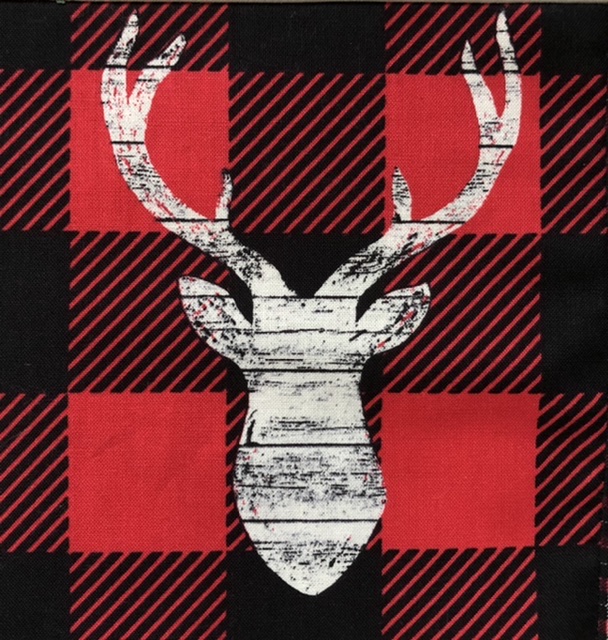
Buffalo plaid backing ready to gnome.
Machine quilted already.
Cutting on the bias for the binding from the rest of the backing. I ghope there’s enough.
The Gnomes were a hit!!
Luke 6:28 Give, and it will be given to you. A good measure, pressed down, shaken together and running over, will be poured into your lap. For with the measure you use, it will be measured to you.”
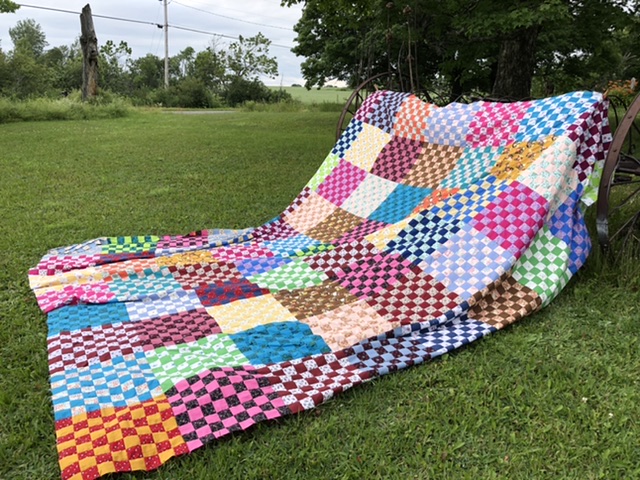
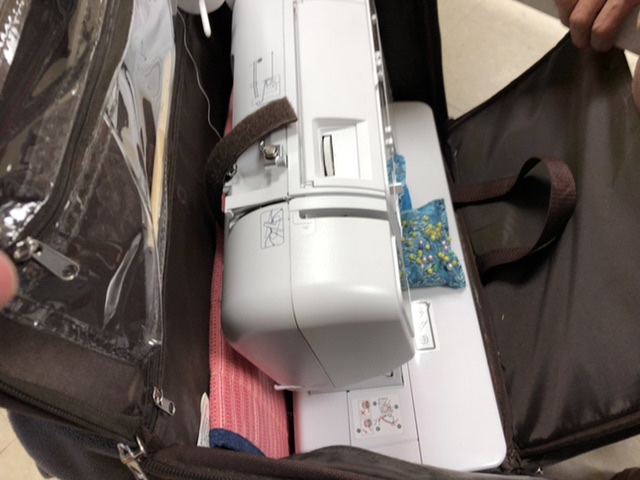
Remember this guy? My Postage Stamp quilt that I made Katahdin King size? Some people wrongly call it California King. Anyway, I took it to my favorite longarmer to be quilted.
Today I started binding it. It’s taking up my chair. This might be a challenge.
Starting the binding.
Sewing right along. One corner down, three to go. Halfway around. Time for a coffee break.
Isaiah 40:31 Yet those who wait for the LORD Will gain new strength; They will mount up withwings like eagles, They will run and not get tired, They will walk and not become weary.
Back at it. Made it around the last corner. Only took four hours!!
Bringing it back over the sewing machine to the chair.
On my bed. The bed isn’t big enough to display it. I might have to get a rake picture.
Took it to our quilt show and displayed it on a bed. Everyone loved it!! It was spectacular!!
On a clear day I can see a little piece of Mount Katahdin from my house.
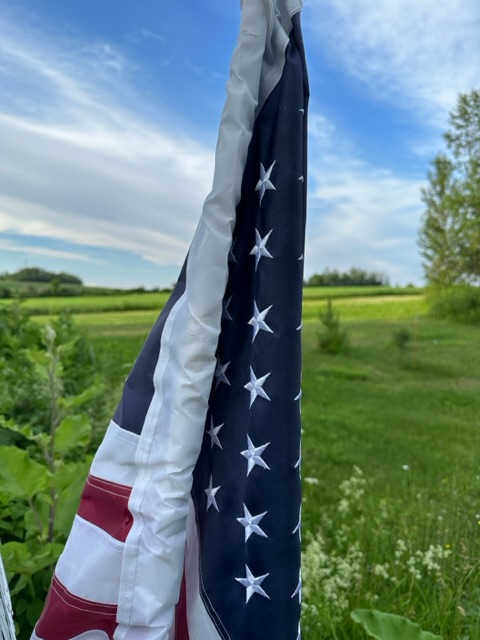
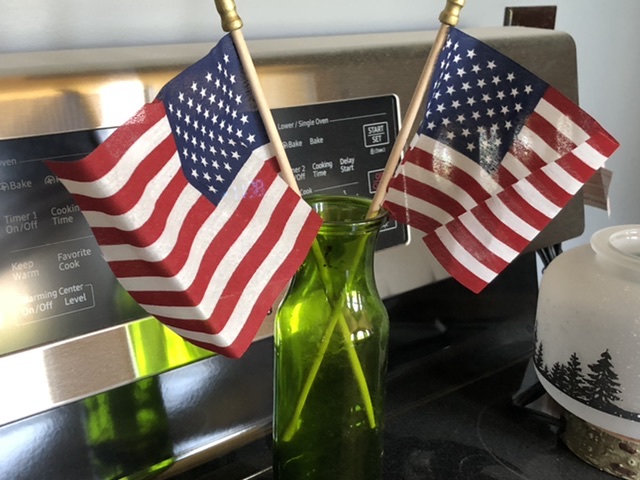
Time lapse. Six or seven-months. We were hit with hurricane winds from the bomb cyclone storm Elliott on Christmas Eve Eve. I lost power at 6:15 PM on Friday. My flag took a beating and later I was able to chisel it out of the ice. Fortunately I planned ahead for the storm and packed the sleigh for our Christmas.
When the power didn’t come on Christmas Eve, (about 22-hours in) my sister-in-law and I went to stay with my nephew and family.
If you’ve been following the blog, you might remember the kids built their log home. Recently, R had time to lay the granite for the chimney. It’s gorgeous!!
Aust wanted to know if I could make him an American flag to hang in his room. I took the challenge.
The Katahdin King delivered.
It was estimated that my power would be restored by Monday. After a great day, I took my sister-in-law home and decided I could manage the night without power. On my way home, the best Christmas lights of 2022!! Six Versant Power bucket trucks on my road. My heat and lights were back on around 8:00 PM. It had been out about 52-hours.
A Merry Christmas was had by all.
Luke 2:14 “Glory to God in the highest, And on earth peace, goodwill toward men!”
Have you heard of a Temperature Quilt? Just recently I’ve seen quite a few of them posted in quilt blogs I follow. I read more about them and found myself intrigued.
I did some homework. You keep track of the high and low temperatures each day for a year and document the temperatures in a quilt. They had me at quilt.
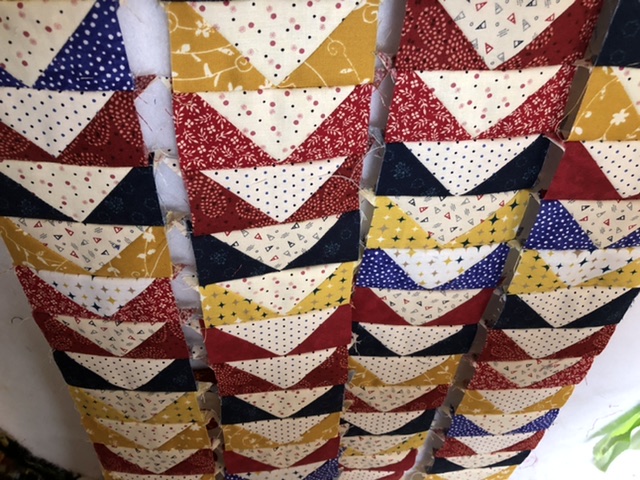
There are as many ways to make one as there are quilters. I decided on two possibilities. The first one was Flying Geese (like the picture above.)
The second was Square-in-a-Square. I made a few notes. I had a couple extra ideas I wanted to try to incorporate, so I decided that S-I-A-S would be the best option for what I wanted to do.
The inside square will be the day’s high temperature and the triangles around creating the second square, would be the day’s low temperature.
I drew the color wheel from my teaching days and listed my temperatures in 5° increments. I had 22-temperature ranges, 24 if I needed to go to 20 or 30 below zero.
Next, I assigned a color to the increments. I went with my Home Economics color wheel and used cool colors; greens, blues and violets; for cool temperatures. The warm colors; reds, oranges and yellows; determined the warm temperatures.
I started to put some fabric samples on my index card, but it wasn’t big enough sew I made a new chart.
My plan is to use fabric from my stash or scrap bin, they just need to fit into the temperature/color range. And be big enough!! Since I’m using scraps, I think I’ll use different fabrics if the colors are in the same range and fall several days in a row.
Today I made a few mock-up square-in-a-squares from the last few days to see if it was what I had sketched out. One thing I wanted to try to incorporate was the weather with the temperature. The center square represents the high, low and snow since it was snowing that day.
I like it, however I might need to modify it some.
Each square represents one day sew most of the blogs I researched suggested keeping blocks small because 365 blocks is a lot of blocks and could end up being HUGE. My squares trimmed will be 3.25.” Maybe 3.5.” I think. Depending on if I change my mind or not.
Right now, I’m planning on making it 20 x 20 squares, it will give me a few extra squares to include a temperature key.
Since several squares might have similar temperatures, I wrote the date on the back using my trusty #2 pencil.
It’s going to take me a while, I need to remember to get the day’s high and low temperatures this year. My plan is not to get too far behind, maybe make 6-7 squares a week on Saturday.
Matthew 16:2-3 He told them, “You have a saying that goes, ‘Red sky at night, sailor’s delight; red sky at morning, sailors take warning.’ You find it easy enough to forecast the weather—why can’t you read the signs of the times?
About a week after I designed my temperature quilt, a lady posted this free pattern download on one of the pages I follow. I’ll keep it in my download file, you never know, I might make it too!! The site is: https://www.canuckquilterdesigns.com I’m sure there are others, search temperature quilts and you’ll get a million in a second.
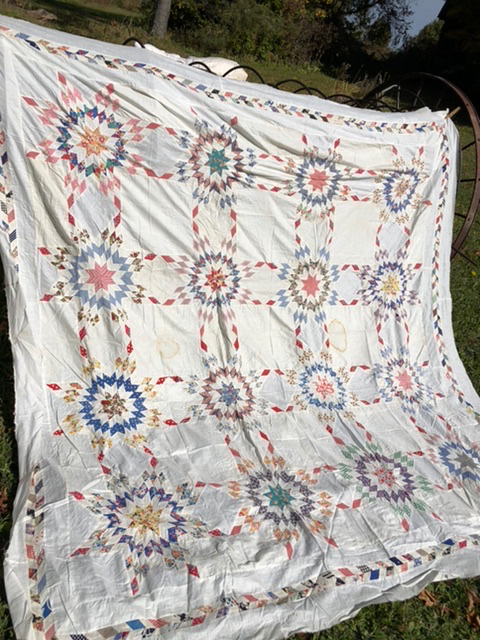
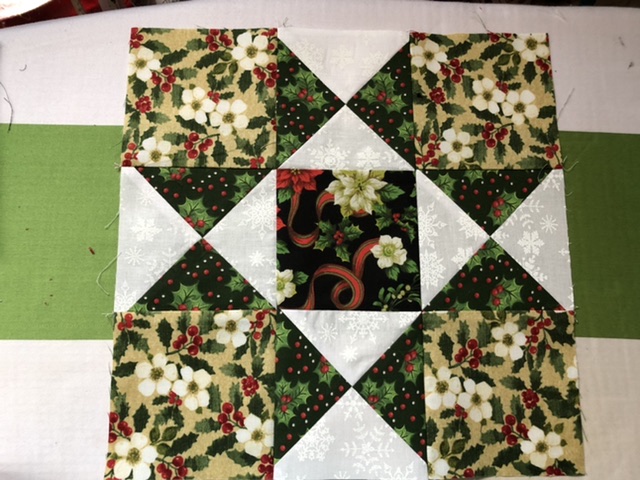
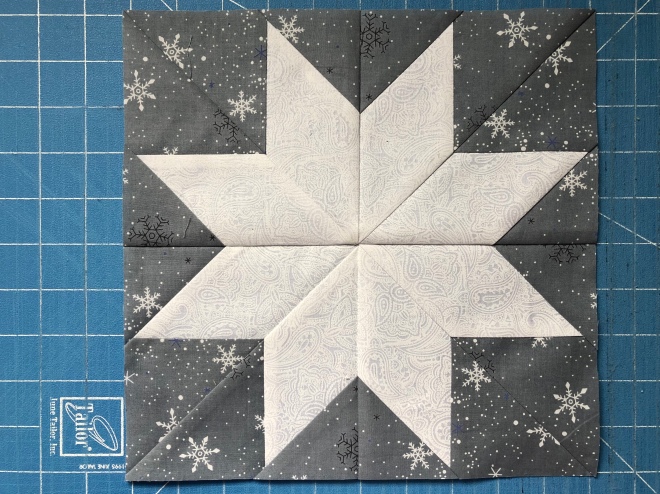
Remember this? Broken Stars or Northern Stars? If you have been following the blog, you might remember this vintage quilt top I found while looking for something else.
I decided to make a replica quilt and duplicate the pattern.
I had some oldies replica fabrics leftover from another vintage style quilt I made a while back.
I didn’t have a pattern, however I’d made a few Blazing Stars in the past, sew I figured I could easily modify it for this project.
I started stripping again.
I dug the fabrics out and made a mock-up. I really liked what I was seeing.
Each star is made up of eight diamond ‘squares.’
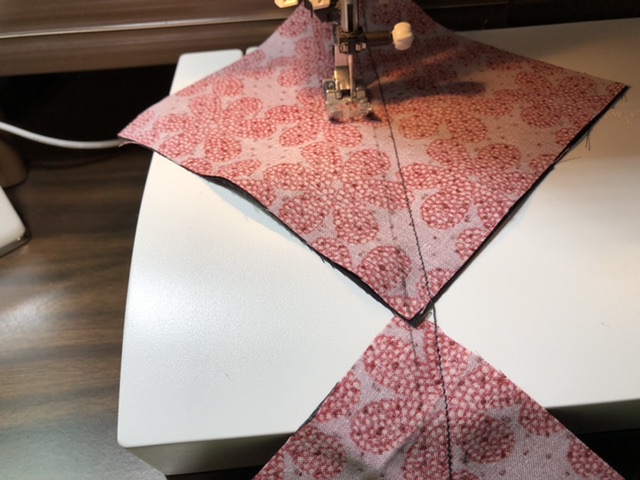
Here’s how it came together. First I lined up the strips into piles of rows for four strip sets. Then stitched each set together. Ready to press.
Pressed and lined up to cut diagonally. I stacked them first to make sure I had the diamonds in the right places.
Next I lined up so I could make the first diagonal cut with my ruler going through the squares on my cutting board to keep the angle.
Cutting diagonals, realigned strips and remaining cuts.
I crisscrossed each set of strips.
Sewing each strip into a diamond. Sometimes I opened it up to check the points.
Proverbs 31:20-21 She sews for the poor and generously helps those in need. She has no fear of winter for her household, for she has made warm clothes for all of them.
Stack of diamonds ready to be pressed.
Pressed. A pile of nineteen diamonds.
Two stars from each strip set. Turned with opposite ends in the center.
Stay tuned. There’s a star studded reveal coming up.
Don’t you just love fabric selvages? There’s so much information on them including the name the designer gave the piece. This one is called, “Warm Winter Wishes.” I love it!! I don’t even have to think of a name for my project!!
Warm Winter Wishes was among all the new ‘Christmas in July,’ fabrics that came in for the big sale. I had to get some. One thing I especially liked about it was it wasn’t necessarily a Christmas print, so it could also be used all winter.
And Buffalo Plaid, don’t you just love it too?
I had to do a mock-up. The backing was Buffalo Plaid and the front was a combination of red, black, brown, tan and off-white. I wanted black thread on the back, but thought it would be too much on the front. I tested the tension with black in the bobbin for the back and an off-whiteish/tan for the top thread. I used my trusty sharpie to put the tension numbers on my mock-up so I wouldn’t forget which was which.
After my curved tool debacle, I went back to my trusty painters tape for good old basic straight machine quilting the runner.
Time to put the binding on.
Some corner points are close to perfect. That doesn’t always happen.
Isaiah 55:10 “For as the rain and the snow come down from heaven, And do not return there without watering the earth And making it bear and sprout, And furnishing seed to the sower and bread to the eater;
All my beautiful leaves are now on the lawn. Usually by this time, they have all blown over to Canada. Perfect day to head out to the guild meeting to see more beauty.
When I arrived at the guild for sew day, there were only a few people working on projects. Here, hand stitching the binding to this chandelier quilt.
This lady had used graft paper and pencil colors to draw her next project.
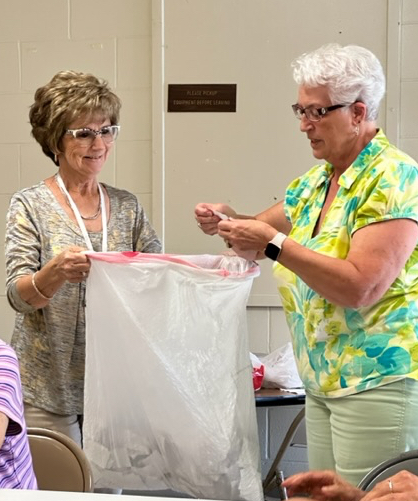
This lady was seam ripping her recycling bag to switch the handles.
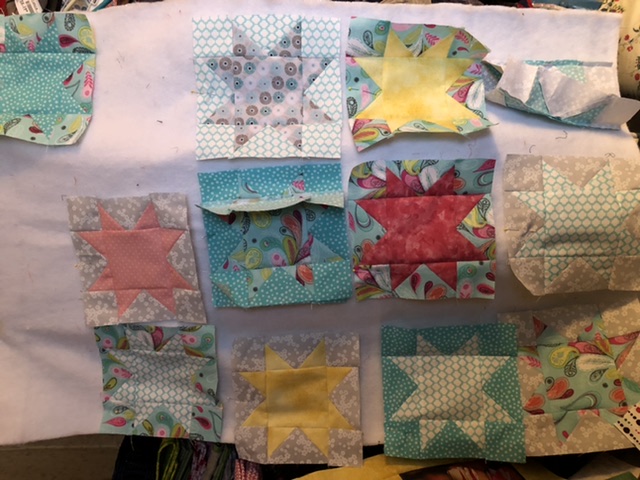
Last month it was decided that we would have a Star block raffle. If you put a star in you got a chance to win all the stars. We had twenty squares. I didn’t win.
I did however win a ‘Sweet Spider’ wall hanging or table runner pattern.
The Demonstration
The lady doing the demonstration this month, showed two techniques. First, ‘Steam-a-Seam,’ using it to hold binding in place so you don’t need pins or clips. I might need to try it.
The second demonstration was similar to paper piecing, but without the paper. She explained how to place the pieces, trimming and finger pressing to get the beak, and other pieces, in the right place. She showed a couple different birds she made for another table runner.
Sew & Tell
First up, a paper pieced poinsettia.
A harvest themed lap quilt.
Deuteronomy 6:23 Then He brought us out from there, that He might bring us in, to give us the land of which He swore to our fathers.
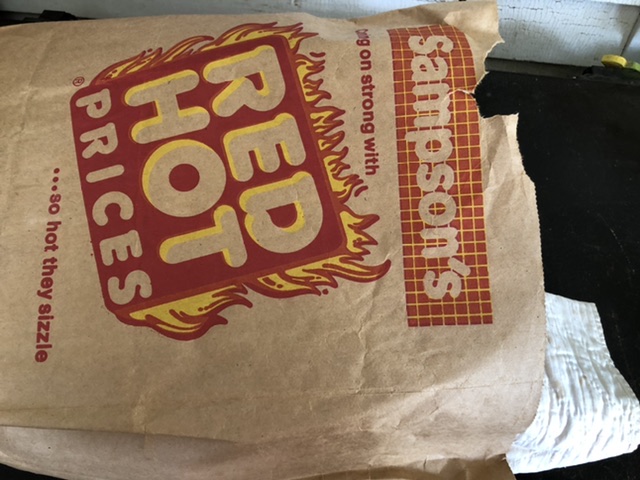
I showed my vintage quilts from my recent blog, Red Hot Prices, and asked members for input on how to clean the aging spots and ideas for quilting. One thing most seemed to say was not to worry too much about the aging spots as it contributes its being vintage.
Next, a double wedding ring done by a woman and her mother.
This woman made a picnic pack complete with placemats, napkins, tablecloth and a bag to put in all in.
This lady showed Christmas cards and a Christmas table topper she made using her embroidery machine.
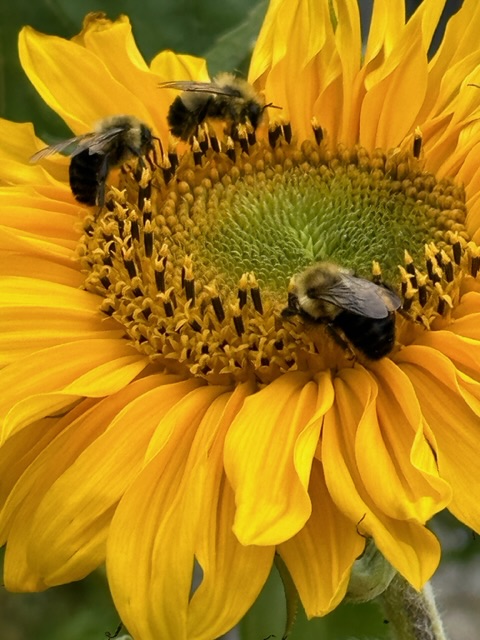
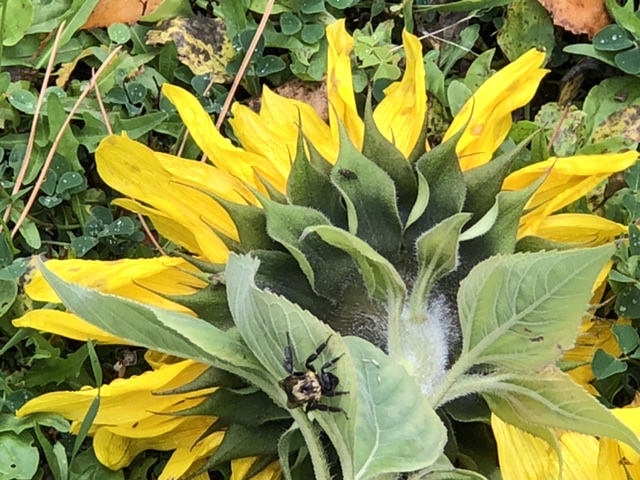
Another successful day at the guild with more great ideas. Even my beautiful sunflowers are going down, but not before the bee gets the last of the pollen.
Galatians 6:9 Let us not become weary in doing good, for at the proper time we will reap a harvest if we do not give up.
Sew, the other day with fall in the air, I thought, ‘why not transform my sewing space.’ It seemed like a good idea at the time.
My pile of fabrics that I’ve had good intentions to use next or put away. However, I managed to get busy on something else and my fabric was taking on a life of its own.
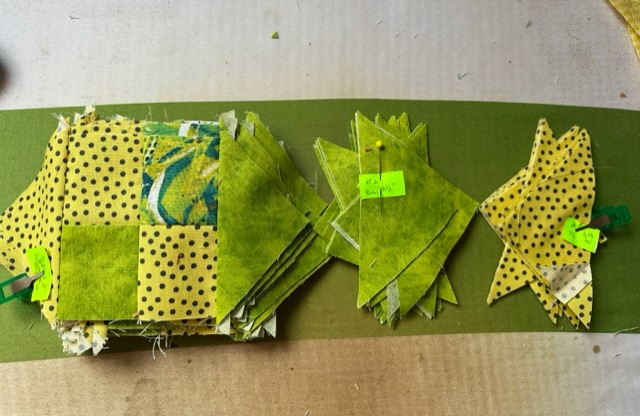
I started with sorting by color. Bee-cause that seemed the easiest.
Whites, yellows and oranges. That white one with stars is a Halloween seasonal, sew that might have to be moved to a different pile.
Lights with prints. Maybe the Halloween stars can go with the Christmas presents?
1 Corinthians 14:40 Let all things be done decently and in order.
I thought I was making progress, but it doesn’t look like it.
One thing I was planning to do was take the bed out or at least stand it up so I could have more space. The bed was from my cousins family business, Dunn’s Furniture Co., Inc., in Houlton, Maine and I think was probably bought 75-80 years ago. It was my mother’s birthday present one year.
I tried to get the pictures in the right direction, but they kept turning on me.
Luke 18:27 But He said, “The things which are impossible with men are possible with God.”
Things went downhill fast. What’s left of the springs, must be made of lead. I could hardly lift the mattress and when I did it basically came back on me. Flipped and upside-down. That was not my plan. There’s probably a million ways to die, but dying by mattress attack shouldn’t be one of them.
I changed my plan slightly and had the kids move it out.
The next day I dug out my mop and dusty Xtra-Lemon with an expiration date of 1968. Still has its lemon fresh scent!!
Later that afternoon I had transformed the bedroom into a more functional sewing space.
It’s still not exactly what I would like, however it’s good enough for now.
It includes a mix of my old sewing items and a few new ones.
Now I just have to find the project I was working on before I started the transformation.
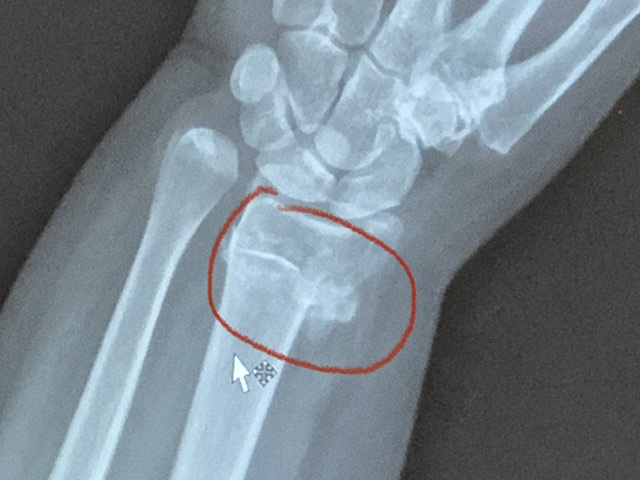
Remember these guys? If you are following the blog, you may remember a bear attacked me when I started this quilt. Well, it felt like a bear attack. It was way back when I fell and broke my wrist. I actually got back to sewing bear claws about a week after the fall. Only to find out later I broke it rather than just a sprain.
The bears are out of hibernation!! They are probably getting ready to go back in!! In the meantime, they made it back to the top of my ‘to sew’ list.
Four rows of bear paws. I usually lay them out on the bed, but today I just draped them over my thread rack. Sew far it’s holding them up.
My sunflowers are sooo late this year. The good news is, I think I’ll have a few blossoms before the snow starts flying!!
I used the brilliant sashing on it. You add sashing to each square rather than a long skinny row. Sew the bottom sashing first. Oops, little photo blooper. I wasn’t sewing this where the foot is, it’s just where the square was when I took the picture.
Bottom (1) on first. Then since I sewed left to right, I sewed strip set (2) next, then (3). Strip sets 2 and 3 have the cornerstones attached.
Adding the rest of the sashing to the squares in the row only need the bottom and right side. Remember, sashing (3) is already on the square to the left (since I’m sewing left to right, you could certainly sew right to left and apply the same principle.) It’s brilliant sashing!!
I couldn’t figure out why my machine stopped sewing. I lifted the fabric and had run over one of my flathead pins!! I haven’t done that in years!!
Close up. I’m probably going to need a new needle.
I moved my next marker pin down some!!
Looks like game day!! I see a Snubber!!
17 right before his goal.
My sleuth of Bear Paws.
Proverbs 17:12 Let a man meet a bear robbed of her cubs, Rather than a fool in his folly.
Genesis 27:3 Now then, please take your gear, your quiver and your bow, and go out to the field and hunt game for me;
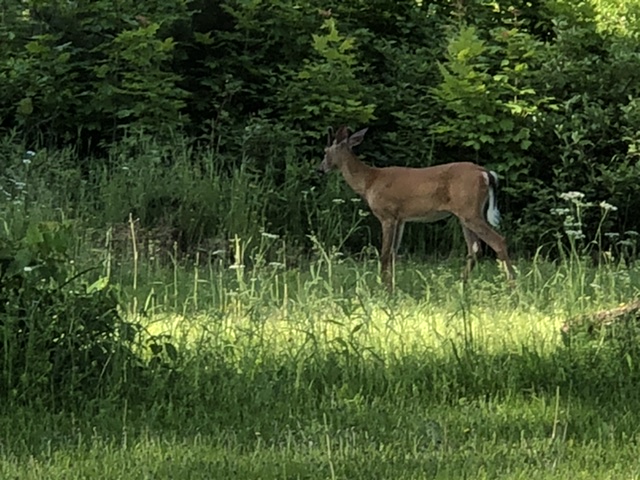
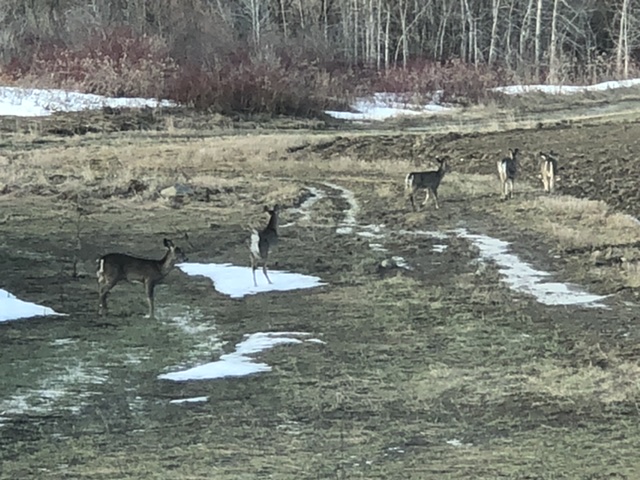
Every once in a while I get wildlife sauntering through my yard.
My next project started with half square triangles. I found this nifty marking tool that works quite well, depending on the size of your pencil. Typically I use a good old fashioned #2 pencil. However, the lead is too big to get into the groove for this one. I found these other mechanical pencils that work well as long as I don’t break the lead. Anyway, I make my diagonal mark on the light square and stitch 1/4” on both sides of the line and get two HST’s.
I chain stitch several at a time.
Tip: I carefully line four up at a time to cut.
Next, just as carefully, put my cutting tool on the pencil line. I usually can double check and see the stitch line under the 1/4” line on the tool. I usually only do four at a time because that’s what fits best on my cutting board.
Just like that, eight HST’s ready to press. What do you suppose I’m making?
I think I need a hundred HST’s. Took a count, 125.
Squaring up.
Mock-up.
Sew far, sew good.
Surprise!! It’s reversible!! Getting ready for the hunt.
For the machine quilting, I have this new tool for curved lines and thought I’d give it a try. Although I like it, I don’t think it was the right design for this table topper.
Sew, I was in my sweat shop, AKA my sewing room, and finished putting the binding on what I’m calling, ‘The Hunt.’
At a distance, it doesn’t look as bad; as I think; as it does up close and personal. I wanted the deer to be right-side-up no matter which side of the table you might be sitting.
Because I made the table topper reversible, the machine quilting with the new quilting tool, didn’t end in the right places on the back, or front, depending on which side is up.
The trees help camouflage it some on these two squares.
The front looks better at a distance too!! There were definitely some lessons learned. For one, I think I should have stuck with my trusty painters tape and straight lines. Next time. Sew & Learn.
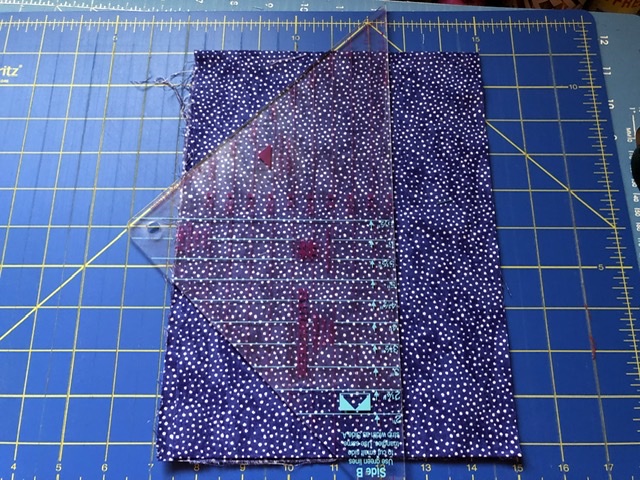
Today I started a new table runner. After all the Fourth of July is just around the corner. I thought hourglass squares might work and started with half square triangles.
A stack of hourglasses.
Trims from squaring up.
Trimmed, stacked and ready to sew.
Backing, batting and top together and ready to machine quilt.
I use my painters tape to line up my points for machine quilting.
Do you see it? My stars are camouflaged into the stars.
Maybe this is better to see. Sometimes I use the same fabric for the backing and binding. Here, I’m adding the binding to the back of the runner first.
Next, turn the binding to the right side and topstitch about 1/16” all around. I moved the needle to the right and use the center of the foot as a guide. These clips are great for bindings.
Psalm 33:12 Blessed is the nation whose God is the LORD; and the people whom he hath chosen for his own inheritance
A couple months ago I ordered a new toy, a cutting tool, online. It’s called X-Blocks. It should have been here in three days, but two months!?! After an email to the online store requesting the status of my order, interestingly enough it was shipped out the next day.
For a mock-up, I sketched out a variation pattern to make using the tool.
It starts with strip sets.
The sub-cuts and center strip.
The square, basically a nine-patch.
Next, line up the lines on the cutting tool to the strip seams. Cutting Tip: Working with this tool, I always worked with the center strip going in the same direction.
I used my rotating cutting board to trim the square. The directions say to keep the trims for borders. Like I would throw them away!?!
In order for my sketched pattern to work right, I had to ‘flip’ the cutting tool over and line up the center strip in the same direction.
Ta Da!! It worked!!
From one strip set I got four squares, sew I cut two each, the basic and the flipped. If you noticed on my sketch, I’m thinking about making a table runner. I better get sewing!!
Another option. I might have to make both!!
Psalm 33:12 Blessed is the nation whose God is the LORD; and the people whom he hath chosen for his own inheritance
Today I sewed some bear claws together. They are actually half square triangles. I need something like 560 of them.
Did you know bears have right and left claws?
Proverbs 19:2 Enthusiasm without knowledge is no good; haste makes mistakes (waste.)
Forty left bear claws. All well and good, but I need right claws!!! Ugg!! I can’t believe it!! I checked and double checked and somehow turned them the wrong way. Guess I’ll take a coffee break and do some seam ripping.
Right claws attached.
One bunch of paws pressed.
Fifty more paws sewn and ready to press.
The fifty paws pressed. I put them in piles the way the squares will be. I better do some ‘goes-in-tas,’ I’m pretty sure I need more, but I think an inventory is in order.
This is what it looks like, remember? I started it waayyy back in January. I guess he’s been hibernating.
My bear claws needed a little pedicure.
Squaring up. Each paw is 6 1/4” after the pedicure.
One claw was a little off. I put one of my ‘stop’ pins in to remind me to snug up the seam when I get to it.
It managed to line up!! I have about eleven squares done and at least fourteen more to go. Originally I was going to make thirty, now I’m thinking twenty-five for a square quilt.
After about my third week of PT for my wrist I decided to try cutting some strips for my Bargello quilt. I needed more wrist pressure to cut, sew my sewing slowed down some. I had compensated, using what I called the ‘forearm’ hold.’ It might have been better called the ‘elbow hold.’
My Physical Therapist is what you might call, ‘the wrist whisperer.’ Or ‘the wrist miracle worker.’ The first appointment had been measurements for the before and afters. The second appointment, I noticed a 100% improvement even though I still had a long way to go.
Proverbs 3:8 It will be health to your body [your marrow, your nerves, your sinews, your muscles—all your inner parts] And refreshment (physical well-being) to your bones.
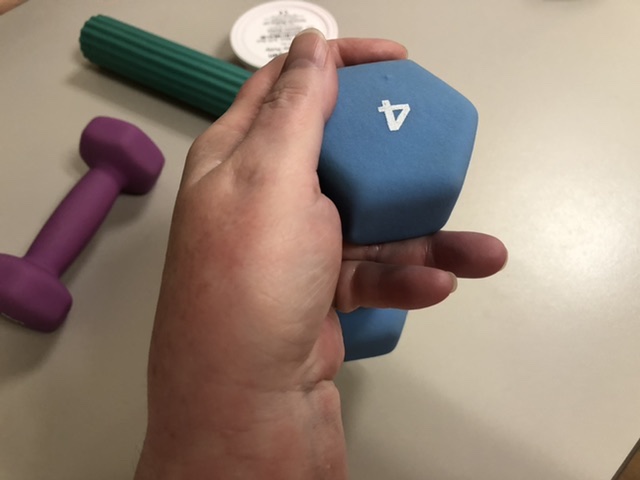
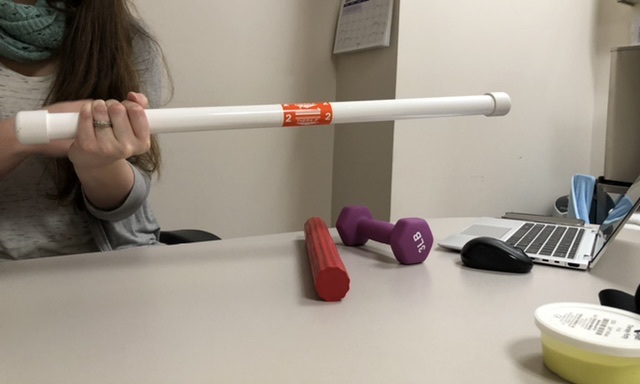
At today’s PT session, she brought out a 3-pound weight and a flex bar.
She demonstrated three or four exercises I would be doing. They seemed easy enough.
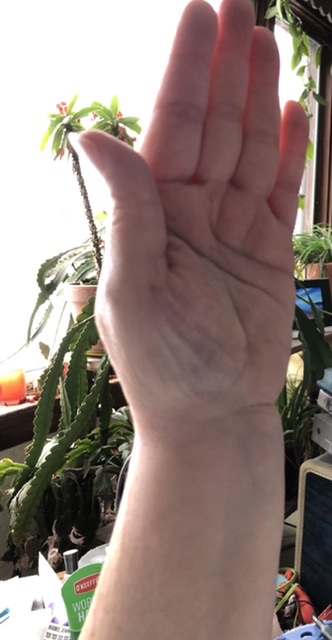
She asked me if I wanted a picture of me since I can’t do a selfie and the exercise without a third hand. In a way it was like rolling pie crust; I had to keep my right hand steady and twist the left down, then reposition and twist up. It wasn’t too bad after I got the hang of what I was doing.
For part of my own homework PT, I did some more strip cutting today. It’s feeling better everyday!! Did you notice it’s braceless?
After 10-PT sessions, she said it’s time to do measurements and compare from the first appointment.
First up, the questionnaire about things I can do and those I have trouble doing. Things like opening my pickle jars and vacuuming. The wrist was about 63.6% disabled that first evaluation, now it’s only 25.2% disabled!! Yeahhh!! That’s a lot of improvement!!
Next, six or eight different measurements of wrist angles. All angles have improved since the first ones.
Another improvement was in my wrist measurement. I lost a whole centimeter!! Most probably because the swelling went down during all the weight lifting.
Remember this gem, it’s the grip. I scored an 18 today!! It was only a 3 that first day.
One question she asked was, ‘if I’d be happy not coming to PT anymore?’ I said, “no, this is the highlight of my day!!” I added that with today’s gas prices, I make a day out of it, going shopping for groceries and fabrics while I’m out.
Ezekiel 37:5 This is what the Lord GOD says to these bones: I will cause breath to enter you, and you will live (and bones will be healed.)
Sew way back at the November Guild meeting, the President asked for volunteers to do a demonstration for three or four upcoming months. At the first meeting they had sent around a sign-up sheet for the year. I didn’t sign up because at the time I didn’t know if I’d join the guild.
John 6:12-13 And when they had eaten their fill, he told his disciples, “Gather up the leftover fragments, that nothing may be lost.” So they gathered them up and filled twelve baskets with fragments from the five barley loaves left by those who had eaten.
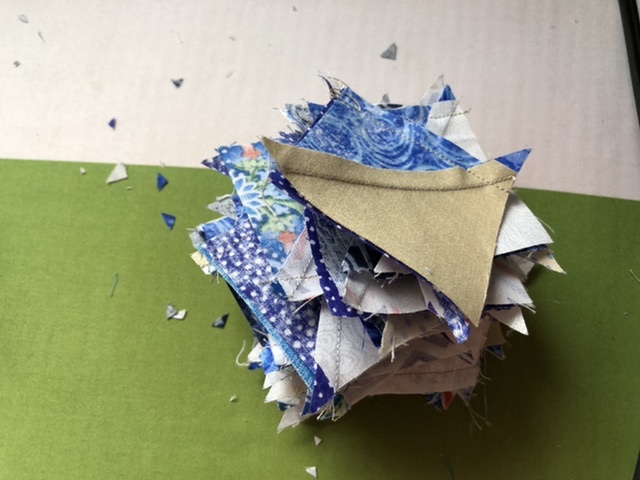
I decided to demonstrate how I use selvages in projects.
The demonstration is only about 15-minutes. I wanted to show a few techniques I use when sewing selvages.
How much selvage to salvage.
Selvage information, organizing and pressing.
Using spray adhesive.
Teflon press mat.
Selecting stitches.
Showing a couple projects.
I set up as everyone was arriving.
I told them how my selvage sewing all started with a pinnie. It’s a little obsessive.
One tip I talked about was how I like using a teflon sheet as a press sheet when I use the adhesive spray. I think they were made originally for baking cookies.
Everyone seemed to like the mini-lesson.
I forgot to get a picture of my selvage bagsew I took one after. It was a hit.
A couple members told me about someone they knew that salvaged the selvages for projects. One knew someone that had made a pair of shoes from their selvages!!
The other day I was kind of in-between projects. I decided I had enough selvages to start a new selvage project. You may remember a couple other selvage projects I did in The Pinnies, where I explained the importance of selvages; and I might add, got a little obsessed; and Mask Spools. I have had a couple more ideas in mind, sew I think I’ll start with a tote bag. First I dug out one of my Wally’s bag of selvages. Yes, you read that right, one.
I pulled out a variety of selvages.
I pressed each and studied it to remind me what I wanted to focus on when placing them. I also checked for flaws, sometimes in the printing or maybe a rip when removed from the machines.
The fabric information is only printed on one selvage. The other side is either usually white or printed to the selvage. Some people sewing with selvages trim off the frayed edges, however I like it, and stitch just inside the fray line.
The selvages printed to the ends are the ones I prefer to use at the beginning and end. It serves two purposes, a little color and I don’t cut off words or dots.
Since I started saving the selvages, I usually tear them 1 1/4” length of fabric I purchased. Could be a yard or ten. I rip it all and put it in a selvage bag. If I was more organized, I’d bag them by color, but for now they are all happy in one overflowing bag.
Because the selvage is narrow, most resources recommend sewing them on muslin. I’ve done this before with a few of my selvage projects and it helps with stability.
The pattern I’m following calls for 9” squares that will be trimmed to 8 1/2”. It suggested drawing some diagonal lines on the squares to keep your selvages straight. I need eight squares.
Next, I dug out my trusty press cloth, turned adhesive spray cloth, to hopefully protect my ironing board cover.
Exodus 35:10 “All who are skilled among you are to come and make everything the Lord has commanded
I sprayed the muslin and then I began placing the selvages by overlapping about 1/4” over the raw edges. I kept in mind the selvage information and the best place to cut. Most of the long ones I saved for the center, the longest section. Another thing I kept in mind was the trimming and seam allowance.
Because most selvages are white, I used white thread and a plain straight stitch. I stitched as close to the selvage as I could, maybe at 1/16”.
A pale yellow selvage. I didn’t bother to change thread color.
Then I remembered this silicone mat I bought for pressing. I understand they were made for baking, like cookies, however I’m really liking it when I use the adhesive spray. My press cloth was/is good, but the spray hasn’t been washing out well. The spray on the silicone pretty much balls up, like when you peel a label off something. Then I just used a cotton ball and some rubbing alcohol to remove the rest on one side.
Next, time to trim.
All trimmed.
Mock-up.
Adding faux leather, aka vinyl, to the top and bottom. I used my clips so not to put pin holes in the faux leather. I put a pin on the fabric side to remind me of the top.
Top stitching.
The bottom has 2 1/2” square cut out of each corner.
Time to make the handles. I found 1/2” cording and covered it with a strip of faux leather. Have you ever seen a navy cowhide? Anyway. I used my zipper foot and positioned my needle far left to get as close to the cording as I could.
I allowed about 3” on each end to make a tab. I cut one and was happy with it, sew I used it for a fancy pattern to cut the other three.
I used a blanket stitch to put the handles on. I’m not 100% happy with them, but I didn’t take them out. Mainly because of the holes, they stay in the faux leather. The handles look and work fine, sometimes I’m a little critical of my projects.
Found some fabric for the lining.
Sewing the side seams.
The box bottom.
Turning the bag inside out.
Finished!! It looks great!! Salvaged from selvages that would otherwise have been thrown away.
Recently my friend took down some old, let’s say, antique, draperies. They were pleated and he said, ‘you can’t buy them anymore.’
I suggested google since it has everything right at your fingertips. He said, ‘no, there aren’t any.’ Later I googled pleated draperies and got three million hits in less than 10-seconds. I think he googled the wrong thing.
He wanted to use the same hardware sew I said I’d look for pleat tape and the fabric to make them.
At my favorite store I found some pleat tape. Since I hadn’t measured yet, I bought ten yards, the whole spool, for the bargain price of $.22 a yard.
He wanted the same red, linen like fabric, less the fading. My favorite store had some fabric that fit the bill. Bonus!!
First step, I took apart the vintage drapery to use it for a pattern. Notice the white paint. Oops!! It’s in several places. Someone put them up before the paint was dry.
Romans 15:13 Now may the God of hope fill you with all joy and peace in believing, that you may abound in hope by the power of the Holy Spirit.
The draperies were also lined. It was tattered and torn. I had some muslin that would be perfect.
Another bonus!! They were weighted and I can recycle the weights into the new draperies.
I was pretty sure someone custom made these. Then a clue. They used two colors of thread. White, mainly on the lining and red on the drapery.
They actually didn’t use pleater tape in them. I’ve never seen this type of heavy paper used before, but it’s basically like interfacing to provide the stiffness needed for the pleats.
They’ll need a blind hem. I think I’ve dissected enough to get my pattern and start sewing.
I went to my favorite store again, shocking, I know, and picked up some of this Header Tape. It’s different than the tape used originally, sew possibly it’s ‘new & improved.’ I haven’t decided which one to use yet, but $.99 probably won’t break me.
Exodus 26:1-2 “Moreover you shall make the tabernacle with ten curtains of fine twisted linen and blue and purple and scarlet material; you shall make them with cherubim, the work of a skillful workman. The length of each curtain shall be twenty-eight cubits, and the width of each curtain four cubits; all the curtains shall have the same measurements.
I started with the lining. Notice my measurements note.
I ripped the muslin to get a straight line. No matter how ‘straight’ the clerk cuts, it’s rarely on-grain.
My pile of lengths.
Since I’m duplicating the original draperies, the lining has one-inch seams.
Next, I put chalk arrows in the selvage to know which direction is the bottom and the right sides.
The red fabric happened to be full of polyester, which meant I couldn’t tear a straight edge. I had to pull a thread to make sure it was on-grain. I started with about an inch and ended with about 1/4”. Again, not cut straight.
Time lapse. I got the lining ready and the drapery panels together. They are 148” wide. That’s wider than the queen size quilt I recently finished. It took nearly a day to get the panels ready. Today I finished the blind hem.
I had to refill my pin cup. Some people, like mechanics, wrongly call it a nut cup.
Ready to pin the lining to the drapery.
Side seams in!! I can see the finish line!! I’ll have to press it tomorrow.
Double pin cushion. Actually one is for pins and the other one is for clips. I really like the clips for these draperies. My pins would all be bent.
It ended up I used the header tape rather than the pleater tape. I had to do some ’goes-in-tas’ for the right distance between pleats.
The pleats are looking lovely.
Another time lapse!! Drapery-up mock-up!! We missed a couple hooks for the left side and they definitely need to be pressed again, however I think they will be fine. Note to self: draperies don’t travel well all balled up in an extra large trash bag.
Sew, I managed to find a new pattern to try. Imagine that!! It calls for eight rows of prairie points. Eight rows!! I might be folding and pressing squares for decades!! Fortunately it also has a different, somewhat quicker method to make them using strips. First you press the 6” strip in half, wrong sides together. Then open and mark lines every 3”, staggered on each side. I used my high tech sewing tool, a number two lead pencil.
Next, cut each line to the fold.
Press each square diagonally.
And diagonally going in the opposite direction on the other side. As a side note, after making a couple strips, they don’t have to be pressed going in the opposite direction, either way works.
Fold and press each triangle again.
And again on the other side.
Fold the bottom points up and press. I used pins to keep them in place. I basted them at 1/8” to keep them in place.
Then I tried the two color method. It was basically the same as one color. I used this link for the pattern because I believe there was a mistake in the other pattern I found. The other one said to sew wrong sides together and I believe it should be right sides together. Sew I went with my instinct.
The colors alternate.
The prairie points are pressed and folded so you only need to baste the long edge to keep them in place. The raw edges are all enclosed. You can fold the tips in or out to get a different look.
What do you suppose they will be used for? Stay tuned.
Isaiah 43:19 Behold, I will do a new thing; now it shall spring forth; shall ye not know it? I will even make a way in the wilderness, and rivers in the desert.
You may remember I left readers hanging on by a thread to see what would happen with all my Postage Stamps. After another mock-up layout, I decided this was looking pretty good. My thought was to make it a California King size. Do you know how big a California King is?!? Anyway … I’m thinking to call it a Maine Katahdin King.
Sew, I could only do my mock-up with half of the postage stamps. On my mock-up wall, aka my bed, I could only see about 35-squares at a time.
Next, I had to do some ‘goes-in-tas.’ My stamps are 15” square. If I make it eight squares wide, that’s about 120”, less seam allowances. Right now the plan is eight squares wide by nine squares long. That’s 1152, 2 1/2” squares. Recently when I stopped at a longarm quilt shop, I asked what the widest measurement I could make and still get it longarm quilted.
While I was there, she gave me a mini lesson on where the measuring ends on the frame. The largest could be 145”. Yeahhh!!! My Postage Stamps will fit.
Matthew 6:34 “So don’t worry about tomorrow, for tomorrow will bring its own worries. Today’s trouble is enough for today.
I had to fold the squares in half so I could get the rest of the row laid out. Even though the layout was quite random, I didn’t want the same color stamps all in the same section. Like several blue squares beside each other.
For my rows, I used my high tech pining system … a post-it that says, ‘Left 1, Top.’ Sometimes it might say Row 1, depends on what I wrote at the time. If play my post-its right, I can reuse them on the next quilt. I should patent it, I could be a millionaire!!
You might notice there’s two pins. One with the row number and one that looks like it’s just there. Actually it’s my directional pressing pin. Sew, in this picture, my directional pin is to press the joining seams down. The next row will be pressed up.
After pressing, I brought the row up and half folded it so I wouldn’t drag it on the floor. It was basically like a stack of eight. Most of my rows aren’t this long, but these are about 120” long.
Next, I put the folded row about halfway covering the prior row sew I could again see which squares were next to each other and I could double check if I happened to move one and get too many of the same colors together.
Nine rows together and showing about half squares. Time to put two rows together.
Right sides together. Last seam. Yeahhh!!! One set of four rows and one set of five rows.
To sew the last seam together, I decided to fold the quilt width-wise first, from the bottom to the seam that’s to be sewn. It was about four folds. Then, folded it lengthwise. This made it a nice little, maybe big, bundle of squares.
Next, back to the machine; keeping my row markers in place; lining up the seam and unrolling the quilt as I went along. I kept the bundle on my lap as I unrolled it. I made it to the end without running out of bobbin. Bonus!! My rolling method might be how someone invented the longarm.
I had to wait again for a dry, windless day to get a rake picture. You might see there’s about two squares wider than the rake on the right side.
Proverbs 16:3 Commit to the LORD whatever you do, and he will establish your plans.
It was a little windy. I think it came out great!!
There’s a rather large anthill by the rake. Hopefully I didn’t bring a few dozen ants into the house!!
After the rake picture, I noticed this beautiful lily.
The other day I started a new quilt using my $3.00 bargain cutting tool I recently bought. I didn’t have a pattern, but figured I could come up with something.
I started with 2.5” strips and sewed five strips for each set. From each set, I got six 60° equilateral triangles, three each long end colors.
For one possible idea I had, I would need six of the same cuts. I made two strip sets the same in order to get six of the same.
This posie was one option. As you might notice, because the paisley fabric had a different pattern for the second strip, that circle didn’t line up like I thought it would.
I figured if I used this, I’d alternate the blocks.
Sew, depending on the prints, some posies came together without much thinking.
I lined up my strip sets and kind of rolled the end up so it wouldn’t be in the way.
I also used my new rotating cutting board so I can do left-handed cuts easier. I lined up, leaving about 3/4” on the short end because I’ll need to make a splice to get the sixth triangle. I line up using both the cutting board and the tool, but it looks like it moved when I took the picture, I double check a lot, so I probably straightened it.
Right side cut and rotary board turned for a better cutting angle.
Left side cut. Keep the scrap.
Keep unrolling and alternate the ruler for the cuts.
Line up both scrap ends. Trim.
Stitch.
Press.
Enough for the sixth triangle.
Ephesians 2:10 For we are His workmanship, created in Christ Jesus for good works, which God prepared beforehand so that we would walk in them.
The second option might be a kaleidoscope. I guess I better take a coffee break and think about what I want to do.
I decided on posies.
To avoid ‘Y’ seams, once I had my layout, I sewed my rows. You can probably see I sewed half a posie in the row.
All rows together, only two halves left.
Time for a rake picture. I had to wait for a calm time, it’s been a little windy lately.
For not having a pattern to go by, I think it looks great!!
It’s a long way around it. Binding on and ready to be turned.
Binding turned. Coming up to a corner.
Ran out of bobbin thread.
Coming to another corner pivot.
Lately I’ve been stitching diagonally about four stitches on my corner folds, then back stitch and pivot to my new direction.
2 Corinthians 8:11 Now finish the work, so that your eager willingness to do it may be matched by your completion of it, according to your means.
Actually I finished the quilt top a while back and finally found someone with a longarm machine to quilt it. I just wanted meandering, nothing intricate. It looks great!!
A picture on my rake. Don’t you just love the flying geese going every which way? Guess that’s how it gets the name, Wild Goose Chase.
It was a little windy.
Maybe a lot windy. I might need better clothes pins.
Sew, the other day I was at one of my favorite thrift stores and like a magnet, I was drawn right to this old Singer Sewing Machine. I have one just about like it that was mom’s and when she got a new one, I inherited her old one and took it to college with me. It was probably the first thing I packed. I didn’t buy it, but I couldn’t get it out of my mind, sew I went back the next day to see if it was still there. It was. For $15 I left the store with a new toy. Like I need another machine!?!
These older machines are workhorses. In the old days, you’d take it apart, put most of the nuts and bolts in a can of gas or kerosene, slosh them around and put it back together again. You can’t do that with today’s computerized machines.
I plugged it in and tried the light. It came on, sew that’s a good sign.
The light came on, but the hand wheel barely budged. It looked like it had the wrong bobbin in it and I could see several strands of thread. I suspected the thread was all fetched up underneath the bobbin. I’d seen this problem a million times when I taught sewing units, for some reason my students didn’t believe me, that each machine had a specific bobbin. I was able to pull some of the threads out, but it still didn’t move.
I decided to check the model number and see if I could find a YouTube video on cleaning a 403A. I thought there would probably be a way to clean it instead of using gasoline.
Google is quite something. I put in my search and got a million links in a split second. I watched about a half a dozen videos, all were basically the same. Shocker! Some called for a different 3-in-1 spray, but I used my trusty WD-40. Judging by the dust, my can might be as old as the machine!!
First step, take off the bottom plate by removing the center screw.
The innards actually looked quite clean. I was expecting to see it packed with dust balls and pieces of thread.
Next remove the top plate.
This machine is more advanced than most people might think for a sewing machine from the 1960’s. This black disc is one of about fourteen. Each one has a different stitch, straight, zigzag, arrows, scallops, etc.
Two screws removed and the top plate came right off. It too, looked quite clean. Like the bottom, I WD-40’d all the moving parts.
The side door opens and actually you can lift it out so not to break the hinges. My students used to like the machines like this because it has a little ‘cheat sheet’ on how to thread the machine.
Next, checking the electric contacts. One of the YouTube videos said to clean them with coke~a~cola. I don’t have any so I used my WD-40.
The one YouTube guy said to use a white rag to see all the dirt and corrosion. I still need to get some grease for the gears sew I’ll give it another once over and grease it then. I asked a kid at Wally’s if they stocked grease and where it might be. He looked at me like I had three heads!! I guess I’ll have to go to another store.
Sew, this machine originally came with options, a couple box of goodies. One is the box on the left. It includes eight of the discs for different stitches as I mentioned above. It also has about eight special feet, zigzag foot, zipper foot, ruffler foot, and pin tuck foot to name a few. In the box also would have been a small tube of sewing machine oil. It had all the tools you’d need to clean and maintain it. Two screwdrivers.
The box on the right in the back had six additional discs that I believe were for monogramming.
The plastic box in the front was a buttonhole foot. It has several size cams for different size buttonholes. I have this with my college machine. If I can’t find one, I believe they are interchangeable for several models.
These goodies were not with my thrift store bargain. I returned to ask if they had sewing items in another place and explained that these would go with the machine. I questioned if they might have been put in a different location if staff putting the items out might not have realized that it goes with the machine. She didn’t know, but thought everything was together.
It took me back to my teaching days when students didn’t know which parts went with each machine. It’s a hard concept for some to understand different parts for different brands. Anyway, I think if I keep checking, the goodie boxes will show up. I could probably try eBay, but I think I’ll wait a while.
Recently I stopped at my favorite fabric store, Marden’s, and as the clerk was cutting my fabric she said, ‘I love this selvage!’ So we talked about selvages a few minutes. She had just started noticing them and collecting some and didn’t know what she was going to do with them. I told her about my Spools table runner and wall hangings that I made from selvages from all the masks I had made this past year.
The next time I went in I brought my table runner to show the clerks. The clerk from the prior day was very excited and asked if she could get a picture of it. I said yes and also offered that they could display it for a while.
They have an incentive for us sewers, like we need an incentive right?!?, to bring in our wares for display. If you are able to leave it for display 45-days, then you get a store gift card for $10.00. Bonus fabric!!
A couple days later I went in, yes, fabric shopping again, and two of the other clerks were there talking about how beautiful the table runner was and one questioned who made it. When I came around the corner, one of them asked me if I was the one that made it. She thought she recognized my name.
We talked about all the how’s and why I made the runner. I explained that I started keeping the selvages while making masks to giveaway. I also was telling them how I wanted to make something that represented all the thread in over 700 masks. Both were amazed at how gorgeous the runner was from these selvages, that normally are thrown out.
John 6:12-13 When they were filled, He *said to His disciples, “Gather up the leftover fragments so that nothing will be lost.” So they gathered them up, and filled twelve baskets with fragments from the five barley loaves which were left over by those who had eaten.
A couple weeks ago I left readers dizzy with all the geese flying around my sewing room.
Proverbs 18:17 The one who states his case first seems right, until the other comes and examines him.
I think I definitely prefer sewing my flying geese to hunting them the way Aust does.
Ten Dizzy Geese squares on my makeshift design wall. I had to overlap them so the plan might change once I see whole squares.
What’s this? Cut 1 1/4” squares.
Next on the schedule, flippy corners on the sashing.
If everything sews according to plan, I should have stars in the sashing.
It’s coming along. Mock-up layout. It’s actually the same layout from my overlaps above.
Sewing tip #22. When I put my rows together, I use the same color pin heads to match seams, a couple inches from the top. Sew here I’m using blue pins to match first square, sashing and second square. The next unit might be red, then green, or pink (depending on how many squares in the row) so if a block gets turned around and the wrong pin color comes up, I know I need to turn it. It’s not a scientific system, but it works for me.
Star points looking pretty good.
Four rows together with sashing. Back to sewing, I need 176 flying geese that are opposites for the border. Sew, they are supposed to be off white geese with different color wings.
Sew, I decided to change my mind, I’ve heard it’s a woman’s prerogative, and continue my stars into the border. The original pattern only had about six stars in the middle. Basically I had to add a second border with star points. I’ll have to do a few ‘gazintas’ to figure out the width of the next border before the flying geese border.
It’s a little more work, but I think it’s worth it for the extra stars.
The ground is finally dry enough to get a picture of the Dizzy Geese quilt top on my rake. As much as I like snow and mud, I didn’t really want either on the Dizzy Geese.
It was quite windy sew I couldn’t get a good picture of the whole quilt. I still have to sew my other 176 flying geese for the border and do some gazintas.
I didn’t think I had a good picture of the second border with the extra stars, but you can see a couple here.
A flock of border geese.
You know that game, guess how many jelly beans in the jar? I prefer how many flying geese on the cutting board?
Is this a better counting angle?
Well, what do I have here?!? Yes!!! More flying geese!! I made more before I counted up the flock. If your guess was 196 in the first gaggle, you would be right!! I’ll have to count the new geese.
Through it all, I hope you didn’t get too dizzy.
Stay tuned for the border.
COVID-19 updates.
Don’t miss a minute of past blogs. Like and share with your friends.
Sew, you may recall I found this Dizzy Geese pattern that I recently started and ran into a glitch during my mock-up. Certain pieces didn’t line up and it seemed it was about a 1/4” off. It doesn’t seem like much, but in the quilting world, like the log home construction world, it’s a big problem.
I studied the pattern and the bulk of the problem seemed to be with the flying geese units. Those love birds were flying too close together!! Well not really flying, but I decided if I stitched them together using 1/8” seam allowance, with the two seams in each unit, I would gain my needed 1/4”.
Some patterns call for a ‘scant’ 1/4”, or just under. I hate ‘scant’ 1/4” because your scant 1/4” might not be the same as my scant 1/4”. Plus it changes your points. And, the beginning of the seam is so small, it often gets pulled down into the feed dogs, getting all fetched up. Did I tell you I hate ‘scant’ 1/4” seams?
Besides being inconsistent, the scant 1/4” hits the seams in such a way that you get a bump in the next seam. Normally that doesn’t happen if you are stitching at 1/4” because you are far enough away from the intersecting seams. The other problem that happens is you only have a few fabric threads holding the seams together. Can you say future holes in the quilt?!!
This was the problem unit where I needed the 1/4”. Now with my geese at 1/8”, it lines up much better.
Here’s my second mock-up after using 1/8” seam allowance for my goose-rs. Sew far, sew good.
I numbered my flat head pins and used them to remind me of the placement.
My third square, rows started. Do you see it?
Yes, I somehow managed to flip my Star points.
Third square done. The Dizzy Geese flying right in half the squares and will fly left in the other half.
Seventh block. The geese are really dizzy today!! It must be the 70° temperature outside. Do you see it? They don’t know if they are flying north or south!! I don’t know how I managed to flip not just one, but two geese blocks!! Now I’m really dizzy!! Time for a coffee break.
Galatians 6:9 Let us not become weary in doing good, for at the proper time we will reap a harvest if we do not give up.
Seam ripped and re-pinned.
I ran out of geese again sew I made another three dozen. I lined them up so I could easily pick ones with different ‘wing’ colors. Not that it mattered much, but I didn’t want a lot of the same prints together, one or two probably wouldn’t throw it off balance like six or eight might.
Another flock of geese ready. The pattern called for something like 176 geese. I made some ahead and then another couple gaggles as I went along.
Another mock-up near ready.
The Dizzy Geese are flying all around!! I’m running out of places to put them. About nine Dizzy Geese squares ready to be squared up. You might not be able to see it, but I lined them up by Star colors so there’s two or three in each pile. In some squares the geese fly to the left and some are flying to the right.
If you’re not too dizzy, I mean busy, keep following to see the reveal.
Coronavirus updates.
Among all the log home construction blogs, there’s a lot of sewing and quilting blogs to like and share with your friends.
The other day as I was scrolling through FB, I came across a pin cushion for sewing machine needles that are still too good to throw away, not the one needed for the current project and keeps them organized. I tried to copy the picture, but it wouldn’t save so here’s the link.
It was $8.99 I think. I didn’t check the shipping cost, but it was probably $10-$12.00. Or, spend $50.00 and get free shipping. I liked it, but I’m a little too cheap to spend that much on one.
My used needle area isn’t very organized and includes a lot of dust. Yes, dust. Shocking!!
I thought quilting it would help stabilize the embroidery, so I used some scrap batting and muslin. I used one of my water soluble marking pens to make my grid. Then selected the triple stitch on my machine.
Exodus 35:35 He has filled them with skill to perform every work of an engraver and of a designer and of an embroiderer,
Next I used my alphabet feature to embroider some common types of needles and sizes onto the grid. One zero went over the line some, but I didn’t bother to take it out.
I’ll probably use a permanent marker to add a couple more categories if needed.
I thought the Pinnie needed some extra weight so I put a small section on the center of the bottom and filled it with lentils. Best use of lentils I’ve found yet!!
To finish the Pinnie, I added some batting and top stitched around the edges. Originally I was thinking about pinking the sides, but I liked the unraveled look where I tore the muslin.
A few scraps, time and creativity and I have an organizing pin cushion for little to nothing.
Genesis 1:14-18 “Then God said, “Let lights appear in the sky to separate the day from the night. Let them be signs to mark the seasons, days, and years. Let these lights in the sky shine down on the earth.” And that is what happened. God made two great lights–the larger one to govern the day, and the smaller one to govern the night. He also made the stars. God set these lights in the sky to light the earth, to govern the day and night, and to separate the light from the darkness. And God saw that it was good.”
Lately I’ve been sewing a lot with bright colored fabrics. I love them!! I’m not sure why I like them so much. Maybe it’s the contrasts from the usual lights and darks. Maybe the uniqueness of something new and different. Or perhaps it’s a good way to use colors like lime green, orange and fushia and have them look like they belong together.
I thought my new Lemoyne Star cutting tool would be perfect for bright stars with contrasting colors. Let the creativity begin!!
Line up strips, checking to make sure the seams are nested together, not off an 1/8” or more.
Perfect!! Ready for diagonal cuts.
For this pattern, this is the only part that is a little strange. Strange, in that you really need two cutting tools to get the first cut. First you line up the Lemoyne tool on the seam line. Next line up a straight tool (that’s long enough to reach the end of the fabric strip) against the Lemoyne tool, then cut the first diagonal. Measure using the diagonal cut and realign as needed for remaining cuts.
Next, basically cut off the ‘dog ear’ lining up from seam line to the point, a 90° angle. Keep it because it will be added on the diagonal to create a ‘wedge.’
Dog ears on each side will be two wedges and after trimming, then will be one (quarter) of the whole square.
A pile of Lemoyne wedges ready to be trimmed. In the directions it said trimming is easier if you have a new rotary cutter blade. My blade is pretty new, however my cutting board has several ‘grooves’ on just about every inch and half inch line.
I decided to cut these sort of diagonal lines on my newer pink board. The directions say to position the point at 2 o’clock (sort of diagonal) for a less awkward cut. What a difference a new board makes!! If you look closely at the blue board, you might see places where I have cut through the board!!
The Lemoyne cutting tool lined up on the ‘10’ lines. It’s lined up, but today I had a shadow making it look like about a sixteenth of an inch into the green.
Some trims.
Two wedges stitched and ready for pressing.
Quick layout so not to get one square flipped.
Like this flipped guy.
Two halves.
Right-sides-together, if I pin the center seams in the same direction as the quarter squares, I won’t have to press until after sewing the two halves together.
Press seams counterclockwise.
All seams pressed in one direction. My iron after it fell on the floor and broke. At least the heating element still works!!
One square ready for trimming. The center points are practically perfect. Twenty or thirty more to go.
A few trimmed squares on my make-shift mock-up wall.
I used nine of the bright stars for a baby quilt for my friends new grandson. You know, because orange is the new baby blue!! I embroidered all his details on it and sent it out. He may never get to use it. His sister latched ahold of it and pretended to be at the beach!!
2 Corinthians 9:10 Now he who supplies seed to the sower and bread for food will also supply and increase your store of seed and will enlarge the harvest of your righteousness.
If you have been following the blog, you know that I had leftover ends from Orange You Glad and The Pileup and I then made The Flying Geeks. I still had some diagonal cuts that I didn’t want to throw away, well really, I don’t throw much away, sew I put on my creative thinking cap and made a couple pumpkins. They became a table runner.
I used my sewing painters tape as I tutorialed in Sewphie Paints. It’s not necessarily unique machine quilting, however it’s quite quick and I like the accuracy.
I love fall and harvest!! There’s nothing like the smell of freshly tilled rows of potatoes!! I love it!!
With fall and a chill in the air, I feel like I have to make all my favorite fall recipes. It’s not necessarily the only time I make them, but with harvesting all my garden produce, like pumpkins, I have to make them.
Pumpkin Pie, Pumpkin Muffins, Pumpkin Roll and a new favorite, Pumpkin Whoopie Pies. A few years ago I made Pumpkin Whoopie Pies for a potluck and they were a hit. I don’t know how, but Martha Stewart found my recipe too!! I like it because it has more spices than most recipes. Of course I added chopped walnuts!!
Pumpkin Whoopie Pies with Cream Cheese Filling
For the Pumpkin Whoopie Cookies
3 cups all-purpose flour
1 teaspoon salt
1 teaspoon baking powder
1 teaspoon baking soda
2 tablespoons ground cinnamon (I used 1 tablespoon)
1 tablespoon ground ginger
1 tablespoon ground cloves
1 cup vegetable oil
3 cups pumpkin puree, chilled (I used 1-15 oz. can)
2 large eggs
1 teaspoon pure vanilla extract
2 cups firmly packed dark-brown sugar
1 – 2 cups chopped walnuts (I use about 2 cups, they make the Whoopie Pie perfect for me!! JB)
For the Cream-Cheese Filling
3 cups confectioners’ sugar
1/2 cup (1 stick) unsalted butter, softened
8 ounces cream cheese, softened
1 teaspoon pure vanilla extract
Directions
Make the cookies: Preheat oven to 350 degrees. Line two baking sheets with parchment paper or a nonstick baking mat; set aside.
In a large bowl, whisk together flour, salt, baking powder, baking soda, cinnamon, ginger, and cloves; set aside. In another large bowl, whisk together oil, pumpkin puree, eggs, and vanilla until well combined. Add brown sugar and whisk until combined. Sprinkle flour mixture over pumpkin mixture and whisk until fully incorporated.
Using a 1/4-cup ice cream scoop with a release mechanism, drop dough onto prepared baking sheets, about 1 inch apart. Transfer to oven and bake until cookies are just starting to crack on top and a toothpick inserted into the center of each cookie comes out clean, about 15 minutes. Let cool completely on pan.
Make the filling: Sift confectioners’ sugar into a medium bowl; set aside. In the bowl of an electric mixer fitted with the paddle attachment, beat butter until smooth. Add cream cheese and beat until well combined. Add confectioners’ sugar and vanilla, beat just until smooth. (Filling can be made up to a day in advance. Cover and refrigerate; let stand at room temperature to soften before using.)
Assemble the whoopie pies: Line a baking sheet with parchment paper and set aside. Transfer filling to a disposable pastry bag and snip the end. When cookies have cooled completely, pipe a large dollop of filling on the flat side of half of the cookies. Sandwich with remaining cookies, pressing down slightly so that the filling spreads to the edge of the cookies. Transfer to prepared baking sheet and cover with plastic wrap. Refrigerate cookies at least 30 minutes before serving and up to 3 days.
I freeze them them and take one for my lunch in the potato fields.
About half of this batch were frozen and the other half I took to the soccer round robin for a halftime treat!!
Ecclesiastes 3:7 A time to tear apart and a time to sew together; A time to be silent and a time to speak.
~ * ~ ~ * ~ ~ * ~ ~ * ~ ~ * ~
Sewing Tip Number Ten
Painters Tape!!
A couple years ago I heard someone say they used painters tape when quilting. Recently I picked up a roll at one of my favorite stores and decided to try it.
The masking tape I selected was wider than the blue tape I’ve used when painting. This one is 1.88” wide. I was looking for nice round numbers, like 2”, but they didn’t have any. I’ll give 1.88” a fighting chance.
I had made a table runner of fruits and vegetables from some left over squares I’d used for something else, look for a prior or future blog page. For the quilting I wanted to stitch diagonally through the squares.
I lined up two strips of the masking tape on the points. Since the tape peels off without leaving any glue, I only used two strips at a time and moved them to the next squares as I finished.
I lined up my needle just off the tape and stitched on both sides of the tape.
After quilting all one direction, I then placed the tape in the opposite direction. There was enough ‘stick ‘em’ on the tape for the whole runner.
My quilting points were perfect!! I don’t think I’ve ever had my diagonals all line up like they did using the painters tape. I’ll definitely keep it in my sewing room for future projects.
1 Samuel 9:7 Saul said to his servant, “If we go, what can we give the man? The food in our sacks is gone. We have no gift to take to the man of God. What do we have?”
I don’t always recycle, but when I do, I use a good old-fashioned brown paper bag to make patterns. They are a little hard to come by now with all the plastic ones out there, but they seem to be making a comeback.
This particular pattern is fairly easy. I’m making a few recycle grocery bags. Because, you know, we all need a good dose of e-coli!! When was the last time you washed your recycling bags??? Studies show people don’t wash their recycle bags much, if at all; they just throw them back in the car for the next shopping spree. And … they are full of germs!!! d-CON in the bag this week, leafy lettuce next week!! Nevertheless, I’m making an attempt to take my own bags to the store with me … when I think of it. Anyway, I cut the bag and use it as a pattern.
For this pattern, I folded the top down about 3 or 4” because some bags I find are too tall and depending on what all is packed into them, is too heavy. I also don’t like the handles too long so that the bag drags on the ground. I left the 3-4” for future bags that I might want bigger. Look at me, recycling again!!
Look what it says, it’s recyclable. For this bag, I put it on the fold for the center of the bottom. Stitched the side seams, bottom and hemmed the top. I thought I had some webbing for handles, but changed my mind and used the same fabric for handles.
Two jars of juice, bran flakes, a can of pineapple and a jar of peanut butter!! So far so good!! Let the e-coli begin!!
Ecclesiastes 3:7 A time to tear apart and a time to sew together; A time to be silent and a time to speak.
~ * ~ ~ * ~ ~ * ~ ~ * ~ ~ * ~
Sewing Tip Number Nine
Pressing seams!!
To press seams to one side or to press seams open, that is the question. In clothing construction, generally speaking seams are pressed open. Most quilting patterns will tell you to press both seems toward the dark color. Or to press to one side, like toward the center.
When I’m pressing seams in my quilt binding, I like to press them open to reduce the bulk at that seam when I am turning it to topstitch. Sewphie agrees!!
Ecclesiastes 3:7 A time to tear apart and a time to sew together; A time to be silent and a time to speak.
~ * ~ ~ * ~ ~ * ~ ~ * ~ ~ * ~
Sewing Tip Number Eight
Lining up sashing!!
Sewphie and I are both a little OCD especially when it comes to matching seams. It can be challenging to line up sashing.
I used to eyeball it to get my sashing lined up. Now I line it up (here I pinned the row back to show) and place the row so it matches my pins in the seams.
Ecclesiastes 3:7 A time to tear apart and a time to sew together; A time to be silent and a time to speak.
~ * ~ ~ * ~ ~ * ~ ~ * ~ ~ * ~
Sewing Tip Number Seven
Recycling & Binding
I don’t always recycle much, but when I do it’s for something practical … like using a gallon size plastic container for my quilt binding. I’ve tried other things like wrapping my binding around cardboard or an empty paper towel tube, but they always get twisted as I’m sewing.
For a while I just left my binding in a bundle on the floor as I sewed. Then one day when I was throwing away one of these ice cream containers, I had a brilliant idea!!* I would cut a hole in the cover, put my binding inside with the end out that I was attaching.
Perfect!! It didn’t get twisted. It didn’t get dusty if I had to leave the project for a couple of days. And I didn’t trip over it if I had to stop halfway through.
Sewphie guarding the Binding Bucket!!
Happy Quilting!!
* ‘A brilliant idea …’. My Great nephew was telling me that he had, ‘a brilliant idea.’ He was 5-years old at the time. You might have thought he’d have an idea. Or a good idea. No, he had a brilliant idea. I asked him if I could use his phrase in the blog from time to time.
Ecclesiastes 3:7 A time to tear apart and a time to sew together; A time to be silent and a time to speak.
~ * ~ ~ * ~ ~ * ~ ~ * ~ ~ * ~
Sewing Tip Number Six
A good light!!
Sewphie loves natural light for sewing, however it isn’t always available. A good light is the next best thing.
Sewphie also likes to listen to the radio while sewing. I’ll have local basketball games on in winter, Red Sox games in summer and my favorite music on the rest of the time.
For the adults in my family, we have been exchanging names and doing a Christmas wish list the last few years. You may or may not get what’s on your wish, but you will get something. The wish list is just a starting point of ideas for the ‘Secret Santa’ to go by. A couple of years ago I saw this speaker lightbulb on FB. I didn’t know what it was. I didn’t understand how it worked. I didn’t understand how music could come through a lightbulb without a dial. I was intrigued by it. I put it on my wish list.
I’m not so sure my Secret Santa knew what a speaker lightbulb was either, however my SS found one and it was one of my gifts that year. I had wanted it for my sewing room. I love it!!
The speaker lightbulb, somehow, I still have no idea how, runs through Bluetooth. Or Bluetooth runs through it. I’ll select something like iHeart Radio on the computer in the other room, select my favorite station, turn on the light to sew and out comes my game or music!!
The speaker lightbulb also changes colors if you want a different atmosphere. I can’t quite figure out how it does it, but Sewphie is in control of the remote!! Here’s blue, pink and green. I like white.
Ecclesiastes 3:7 A time to tear apart and a time to sew together; A time to be silent and a time to speak.
~ * ~ ~ * ~ ~ * ~ ~ * ~ ~ * ~
Sewing Tip Number Five
Repurposing!!!
Sewphie loves using old irons as doorstops!! I’ve managed to burn through many irons over the years. It’s only been the last few years that I decided to keep the new ones to go with my iron collection. I think it’s because the new ones don’t have the character that the old one do.
This newer one was great for pressing, not so good as a doorstop. It has a tilted bottom so the iron doesn’t hit the door. Plus it’s light, not much weight to hold the door. Good thing the old one is heavy and flat!!
Ecclesiastes 3:7 A time to tear apart and a time to sew together; A time to be silent and a time to speak.
~ * ~ ~ * ~ ~ * ~ ~ * ~ ~ * ~
Sewing Tip Number Four
Left side cuts
Once I have my strip lined up, I don’t like to turn it or try to twist my arm around for the left side cut. Instead, I usually use two of my cutting tools. Here, I’m cutting Dresden Plates and once in place, I put another straight edge cutting tool against the Dresden Plate tool.
Holding the second tool in place and carefully moving the Dresden Plate tool, I am able to make a straight cut on the right side.
Put the Dresden Plate tool back, line up and continue cutting.
Ecclesiastes 3:7 A time to tear apart and a time to sew together; A time to be silent and a time to speak.
Sewing Tip Number Three
Using color coded pin heads!
Here, Sewphie is showing another one of my pin systems I like to use. This one reminds me of three things. Sometimes four.
Green pin – Good to sew
Yellow pin – Slow down
Red pin – Stop
I’ve used different color pin heads to remind me to slow down and to stop. Generally speaking when I use my red pins to stop, it’s when I need to backstitch.
Like for example if I’m putting a zipper in a skirt. I would put a green pin at the beginning and a yellow pin as I’m getting close to where I need to stop. Next, the red pin to stop and backstitch. Sometimes, in the case of a zipper, I might have a blue pin, to baste, placed after the red pin, to change stitch length and continue basting the remaining seam where the zipper will go.
Ecclesiastes 3:7 A time to tear apart and a time to sew together; A time to be silent and a time to speak.
Sewing Tip Number Two
Develop a pin system that works for you!!
Here, Sewphie is showing one of my pin systems. This one reminds me of two things.
Left side
Pressing direction
When I’m ready to begin sewing quilt squares into rows, I use a flat head pins that I have written numbers on them to indicate the rows. Usually I use even numbers; 2, 4, 6, etc., for even rows; and odd numbers for the odd rows.
I will put a pin in the left square, Row 1, pin #1, Row 2, pin #2, etc. In some projects it might not matter, but if there’s a pattern and it needs to be in a certain way, I don’t want to flip my row to be on the opposite side. The pin reminds me to put that square on the left.
In addition, I will point the pin in the direction that I need to press the seams of the row so that they will nest together when I put two rows together.